This document will show you how to use the ARitize 3D application on Woo Commerce system.
1. Install the Plugin
To use the system, you need to install the plugin first. There are two ways to install the 3D plugin on WordPress
1.1 Install Plugin by Zip file
Step 1: Log in the store successfully
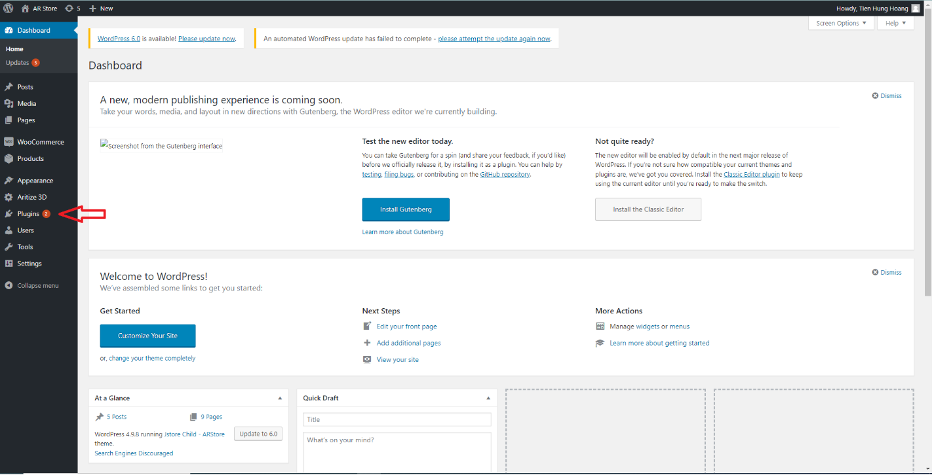
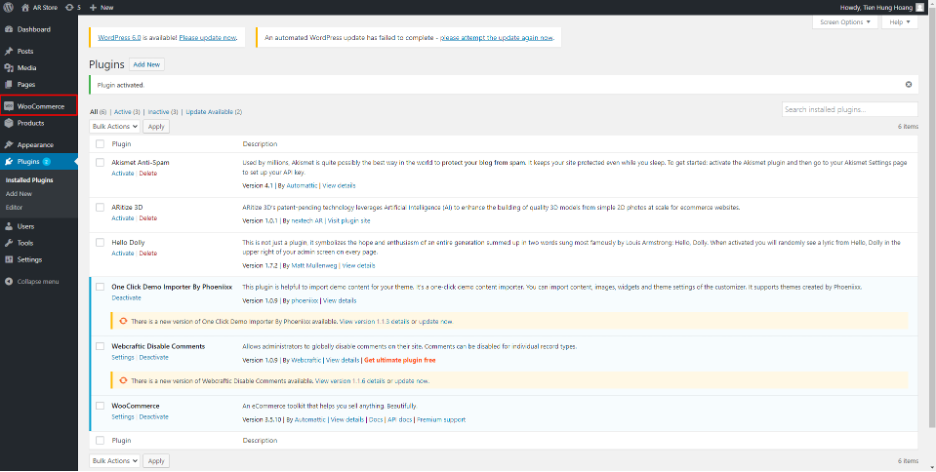
Step 2: On the left menu, select Plugins
Step 3: Pre-condition: 3D Plugin is available on WordPress plugin store. Select "Add New" >> "Upload Plugin">> "Choose File".
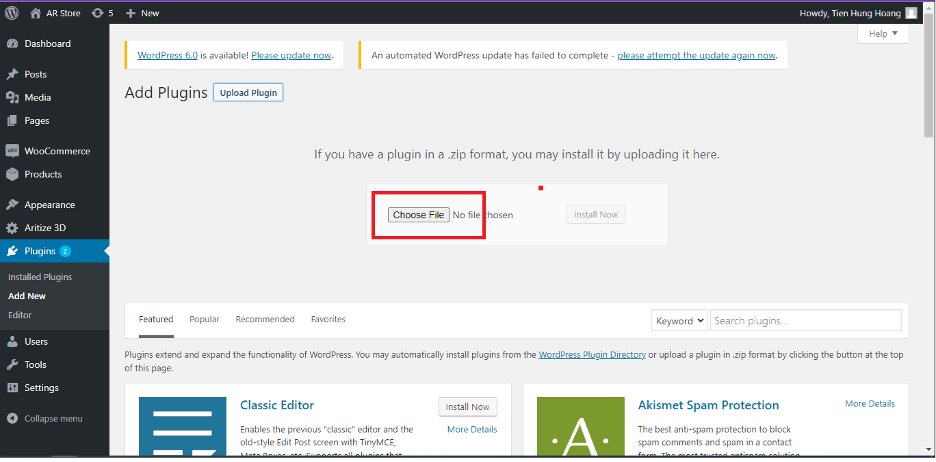
Step 4: Click Install Now button to install the application. After installing successfully, the application will be displayed on the plugin list.
Notice: Please ensure that your WooCommerce store is already well configured. Otherwise, ARitize 3D plugin can not be activated.
1.2 Install plugin by downloading directly from WordPress Plugin store
Step 1. Go to Dashboard of your WordPress ecommerce website. Click to Plugins menu
Step 2: Click button "Add New"
Step 3: Input keyword "aritize 3d" in textbox search
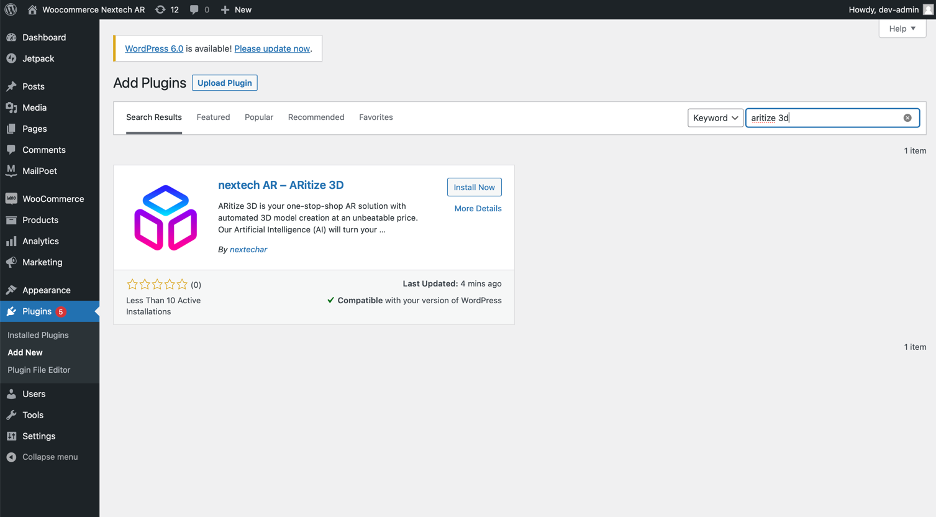
Step 4: Click "Install Now" button
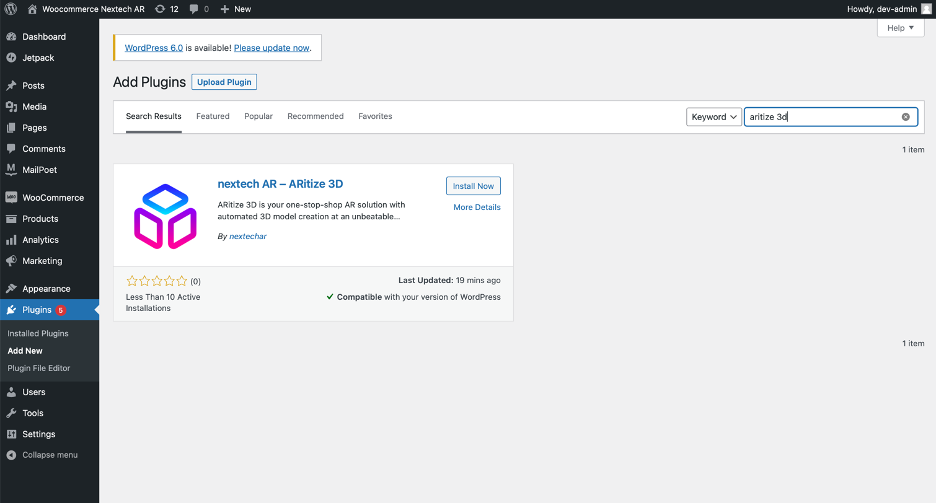
Step 5: Click "Activate" button.
Notice: Please ensure that your WooCommerce store is already well configured. Otherwise, ARitize 3D plugin cannot be activated.
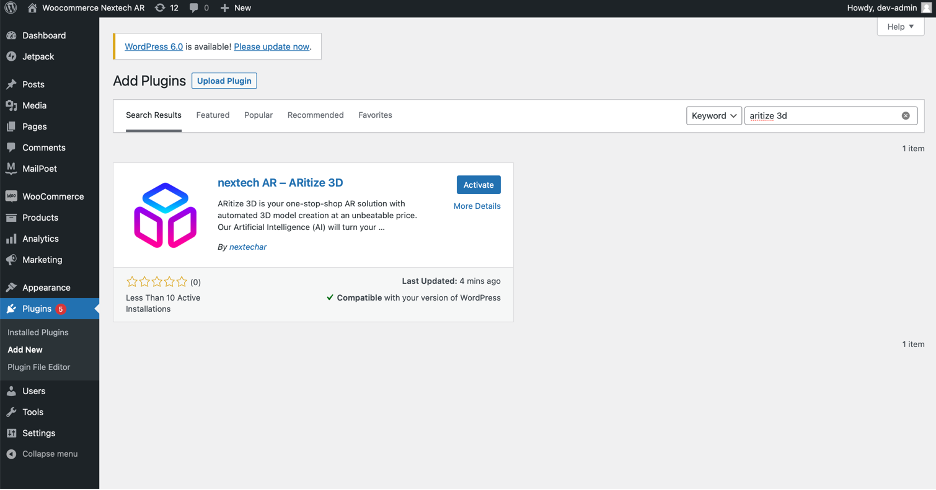
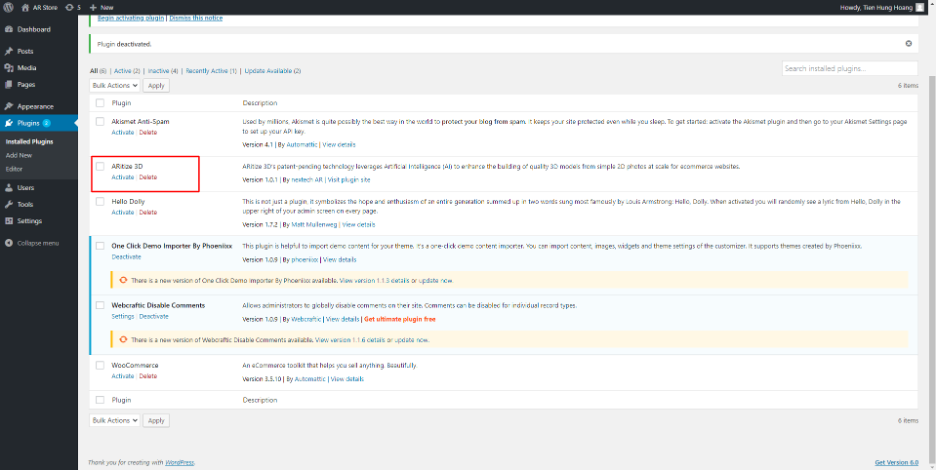
The Aritize 3D plugin has been installed successfully.

2. Activate and Configure Plugin
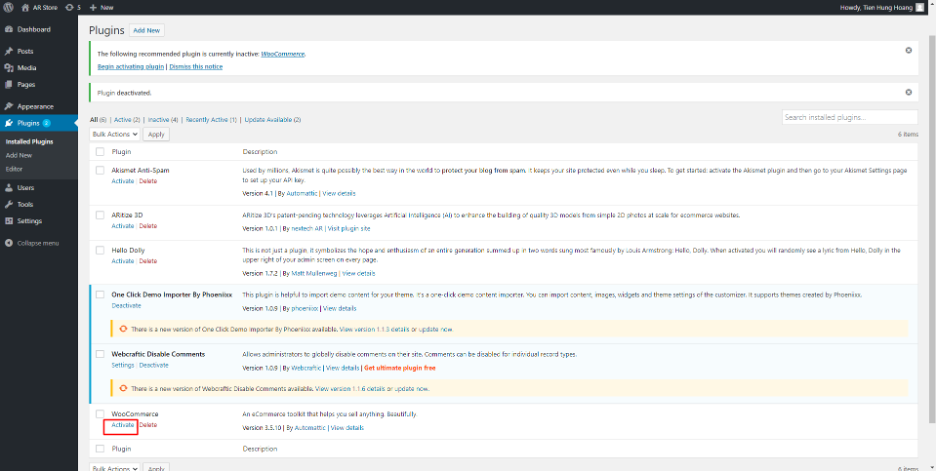
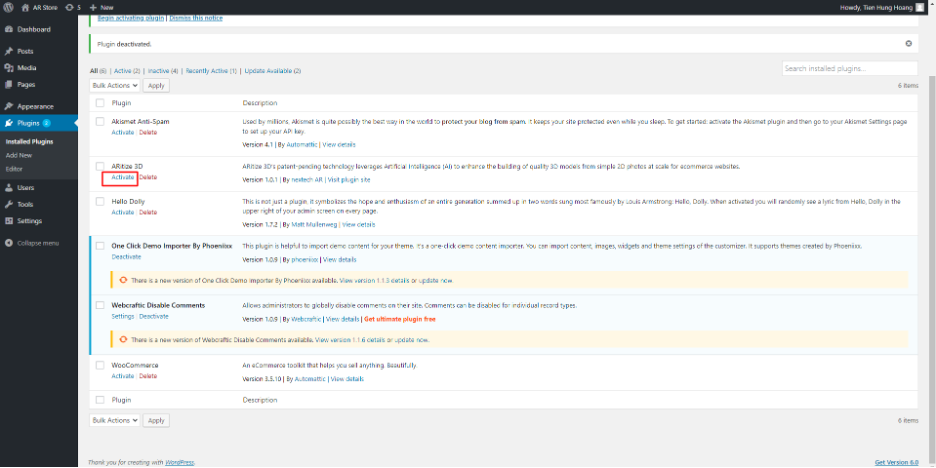
Step 1: Click Activate on WooCommerce section to activate the WooCommerce system, and the plugin WooCommerce will be displayed on the menu list.
Step 2: Click Activate on ARitize 3D section to activate the ARitize 3D system, and the plugin ARitize 3D will be displayed on the menu list.
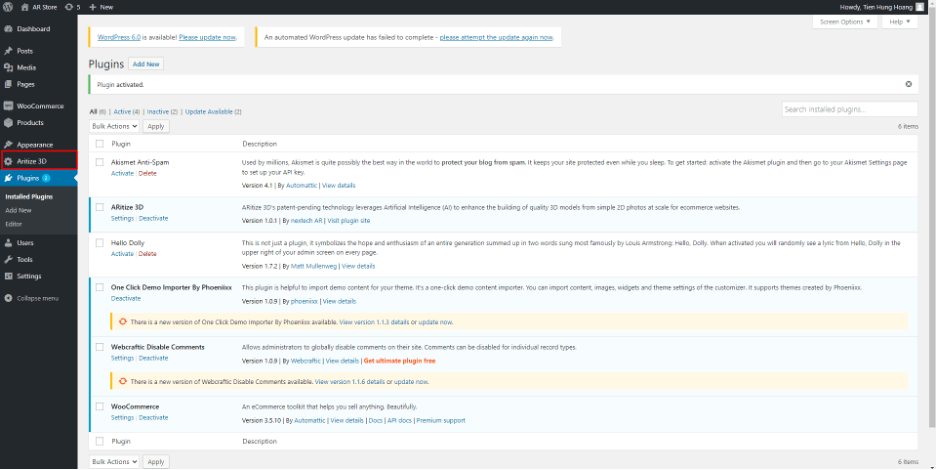
Step 3: After activating the ARitize 3D app successfully, go to Settings.

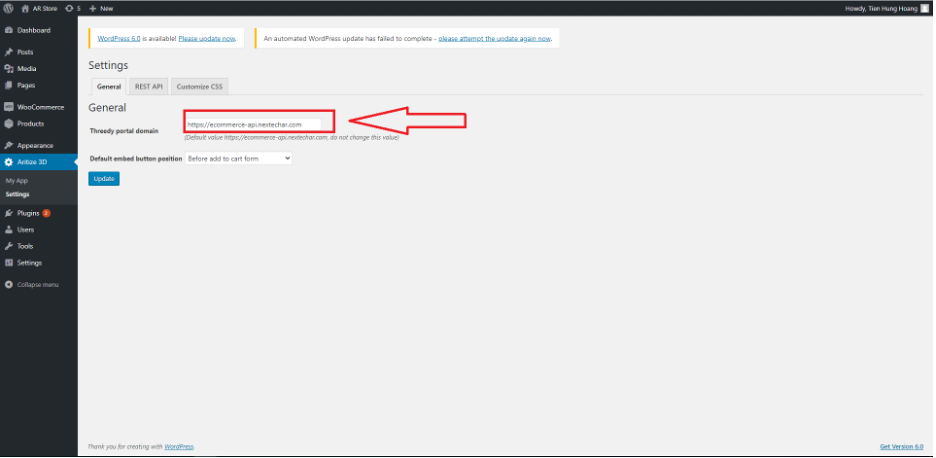
Step 4: In the ARitize 3D setting, open General tab.
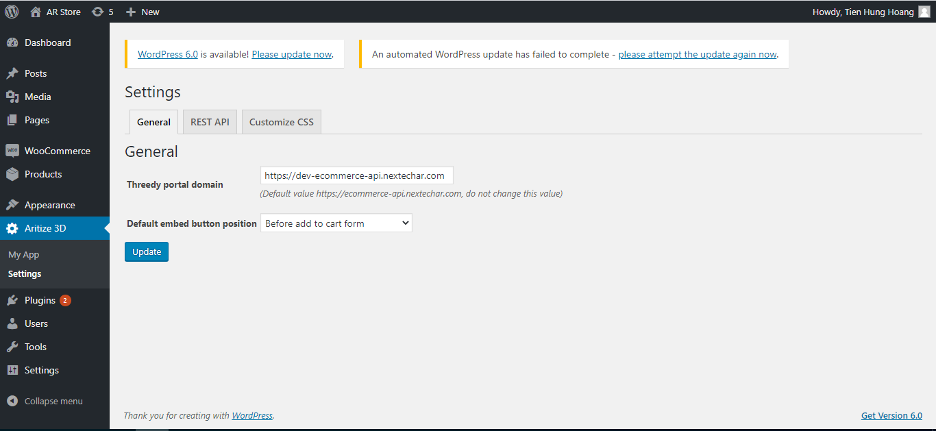
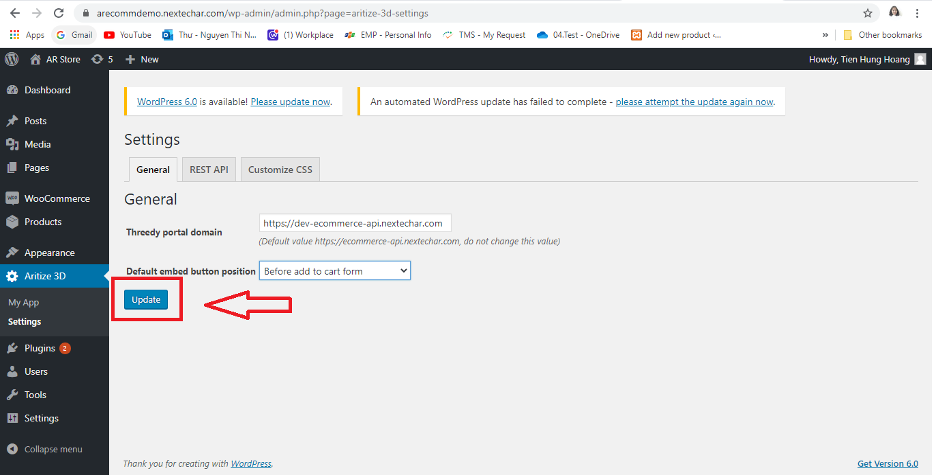
- Check to ensure that the Threedy portal domain has the following address: https://dev-ecommerce-api.nextechar.com
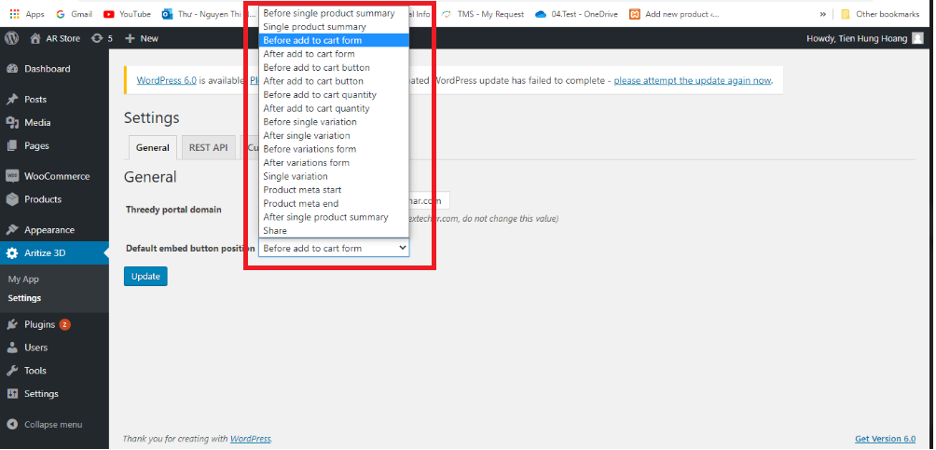
- Select Default embed button position by clicking on the drop down list. This selection will be applied as the default embed button position on the product detail pages.
Step 5: After selecting all information, click on Update button to save all information.
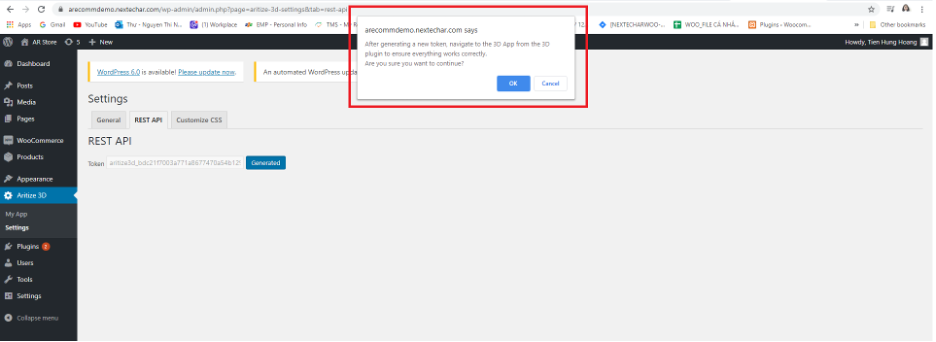
Step 6: Open REST API tab
- Click Generated button to generate token. This step only needs to be completed once.

- If you click on generate button again, the system will display a warning pop up .
3. Create a new 3D model
Verify created product on WooCommerce
In case you dont know how to create a product on WooCommerce, please refer to the link for detailed steps:
https://woocommerce.com/document/managing-products/
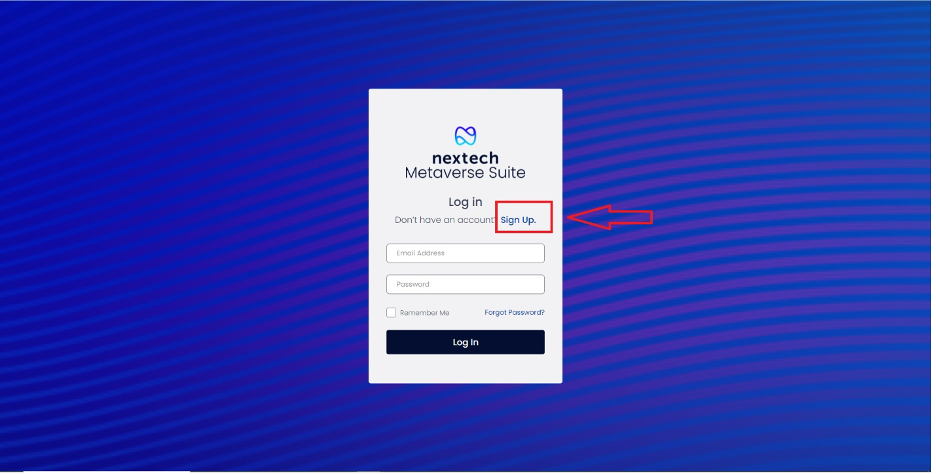
Sign up
Create a new account with Nextech AR
Step 1: If user dont have account, please click on Sign Up button.
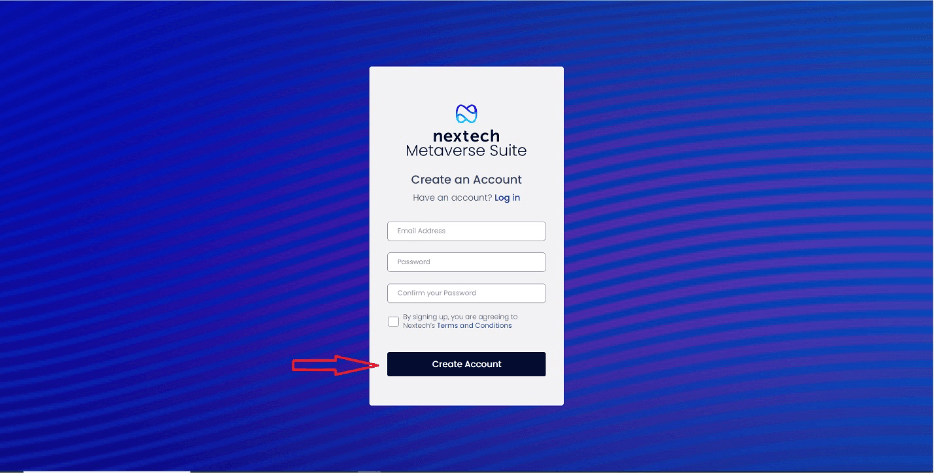
Step 2: Input all valid information then click on Create Account to sign up.
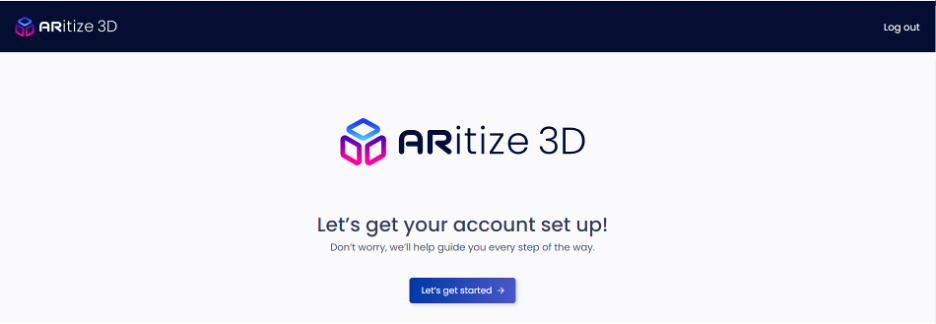
Step 3: After register successfully, the system will redirect to dashboard of current user.
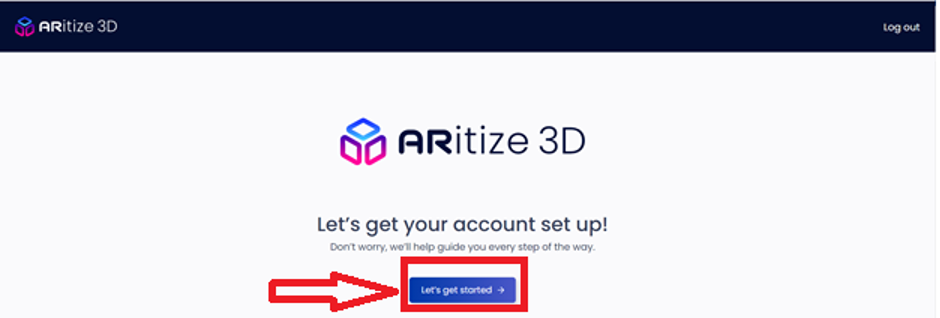
Step 4: Click on Lets get started.
4. Log in
Open ARitize 3D application successfully, log into the system.
Step 1: On log in screen of ARitize 3D application, input valid email address and correct password then click on Log In button.

- Click on Remember Me to save current information.
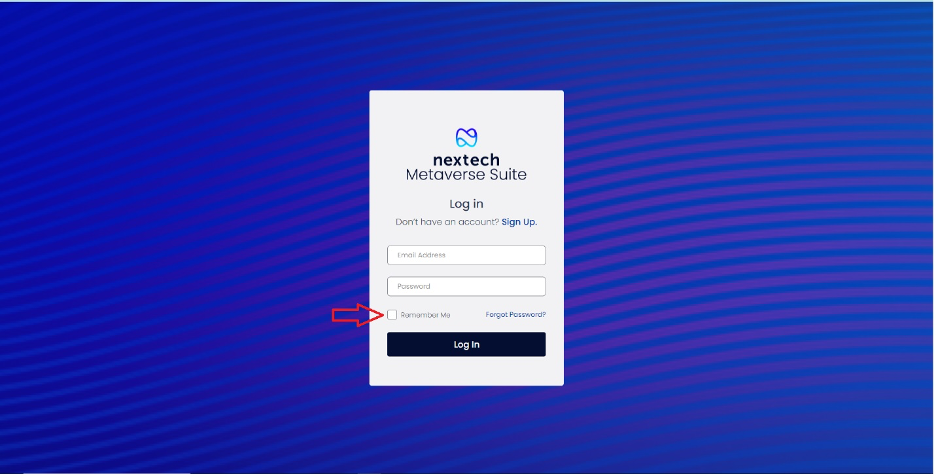
Step 2: After logging in successfully, it will direct user to the dashboard screen as below.
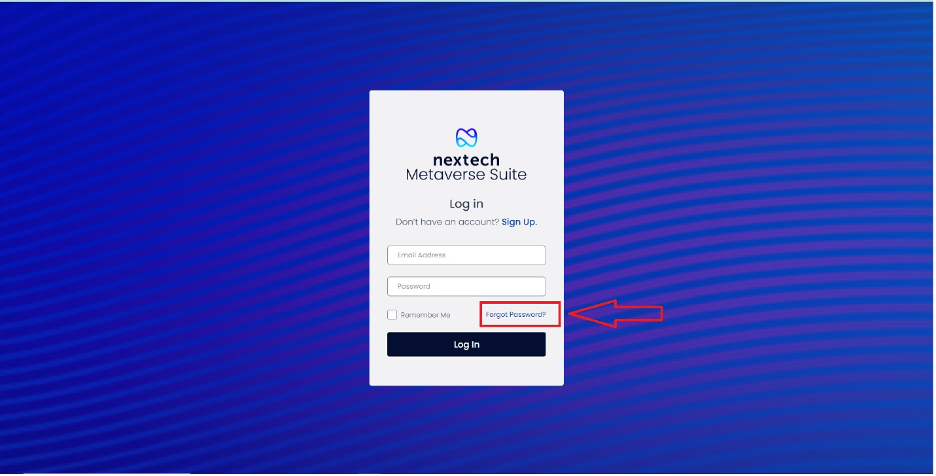
- If users dont remember password, click on Forgot Password button.
- Input email address then click on Send button.
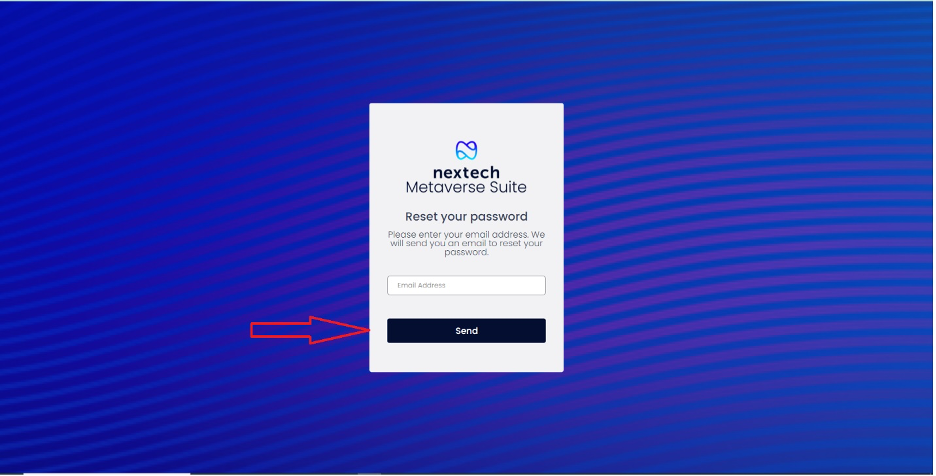
The password will be sent to the users email. Then the user can use the email to login.
5. Select plan
After registering successfully, click on Lets get started. The system will redirect to Select plan section. In this section, users will select the plan that they want to purchase.
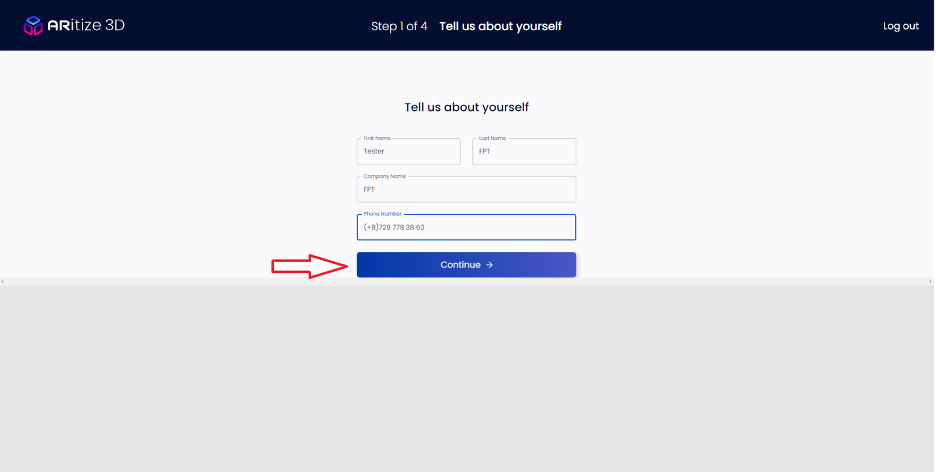
Step 1: Enter your information then click on Continue.
Step 2: Select the plan that you want to purchase, and then click on the Confirm Plan button on the confirmation pop up to redirect to step 3.

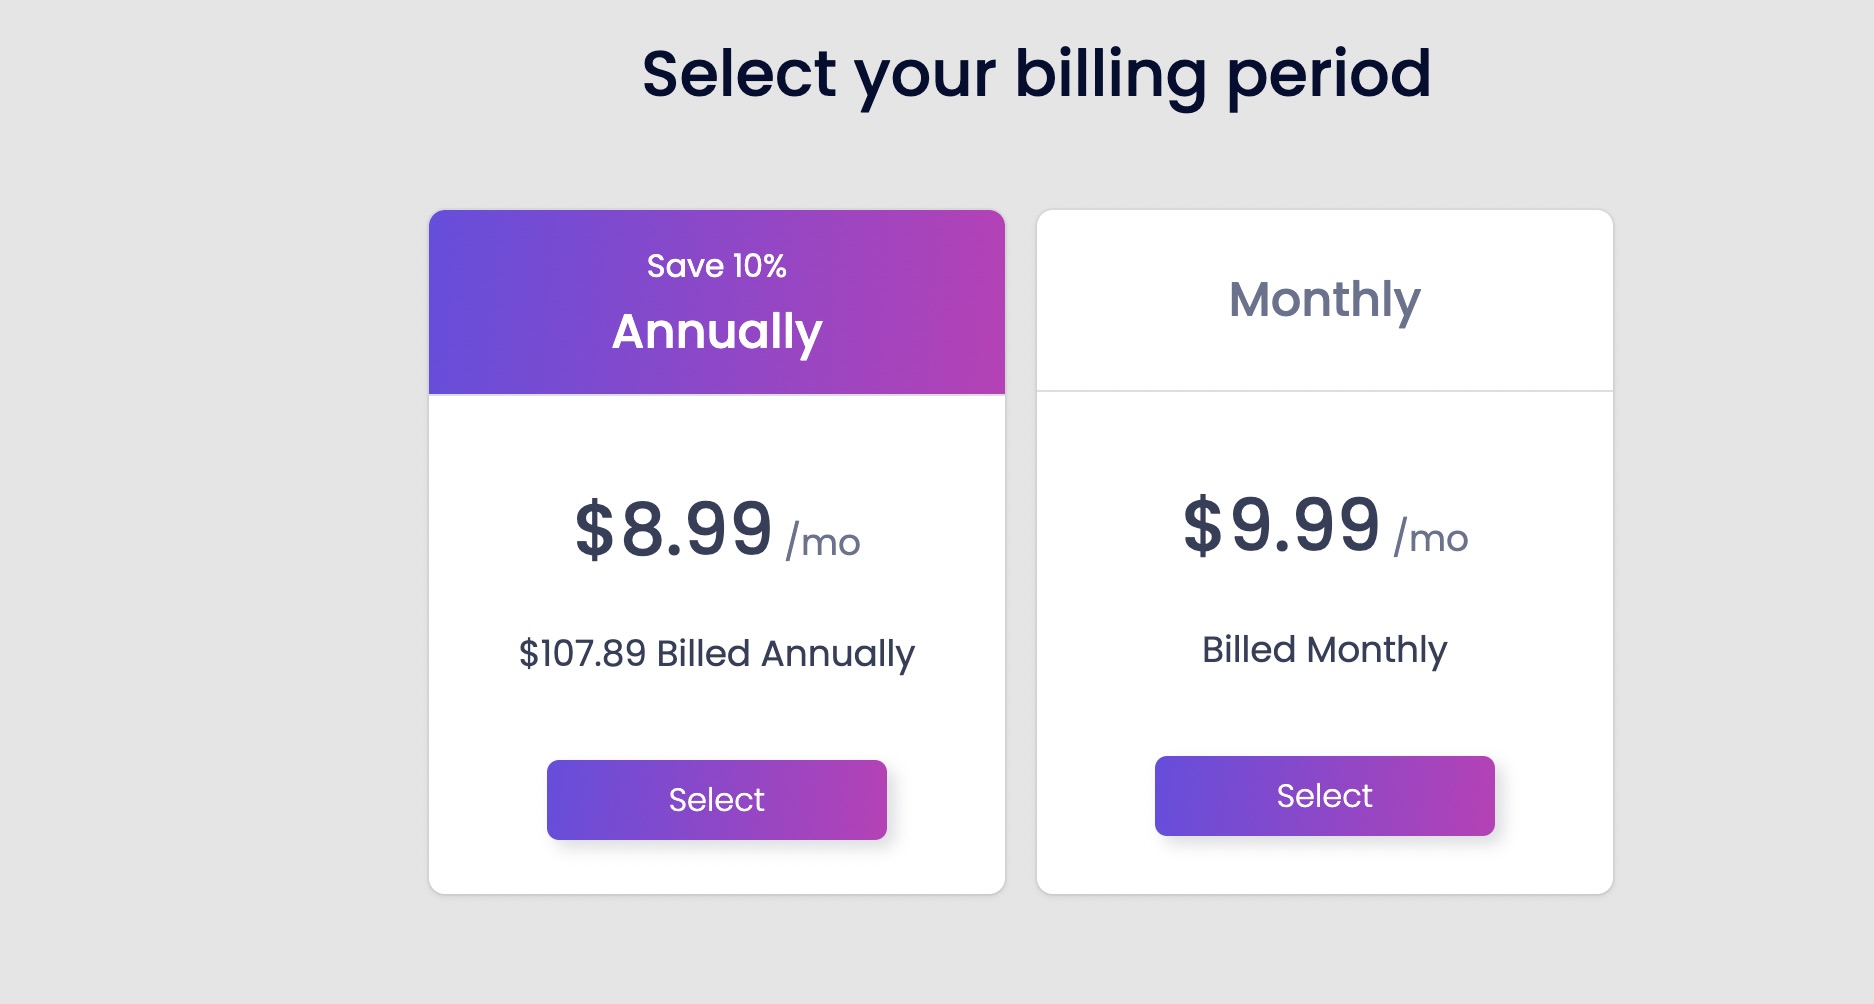
Step 3: Select the billing period that you want, and then click on the Confirm Plan button on the confirmation pop up to redirect to step 4.
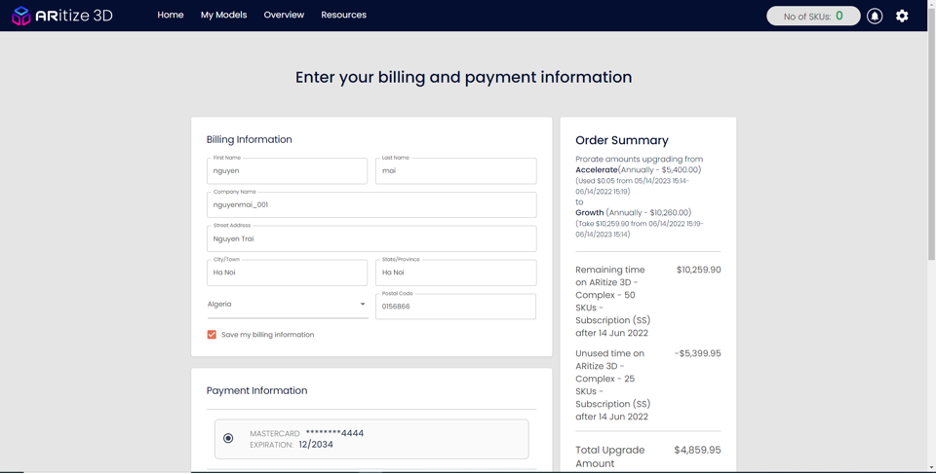
6. Enter Payment
To continue using the application, users will need to enter their payment.
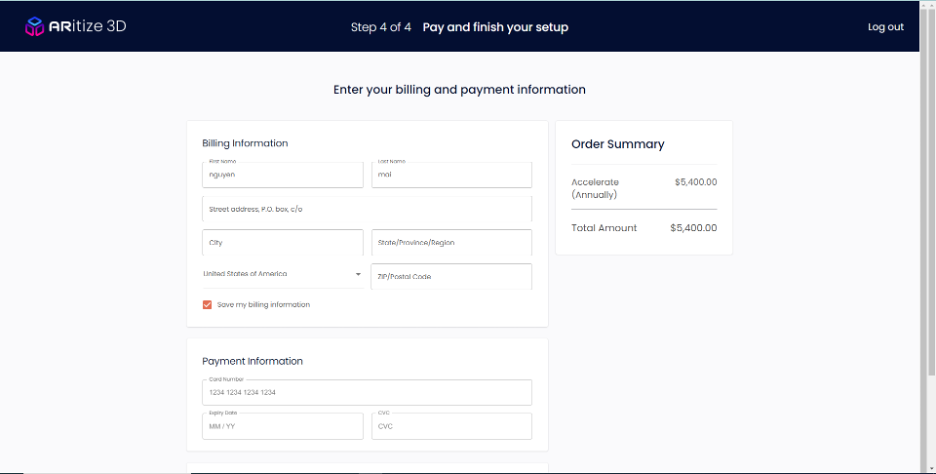
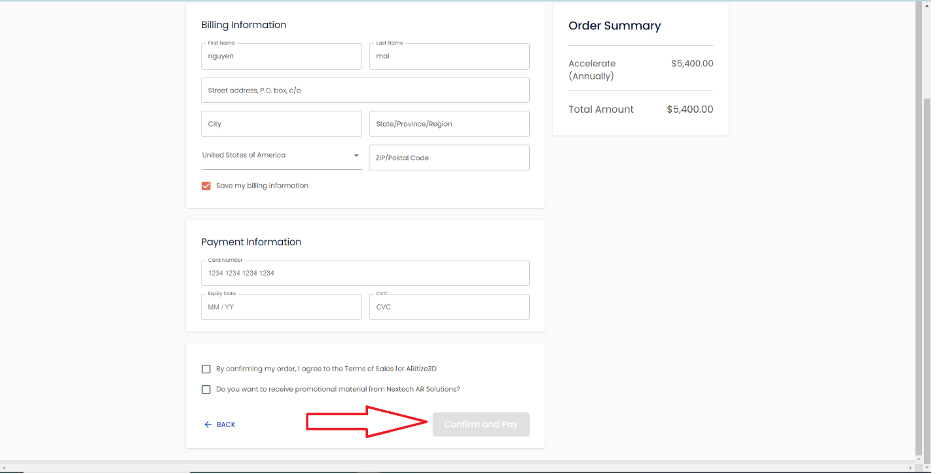
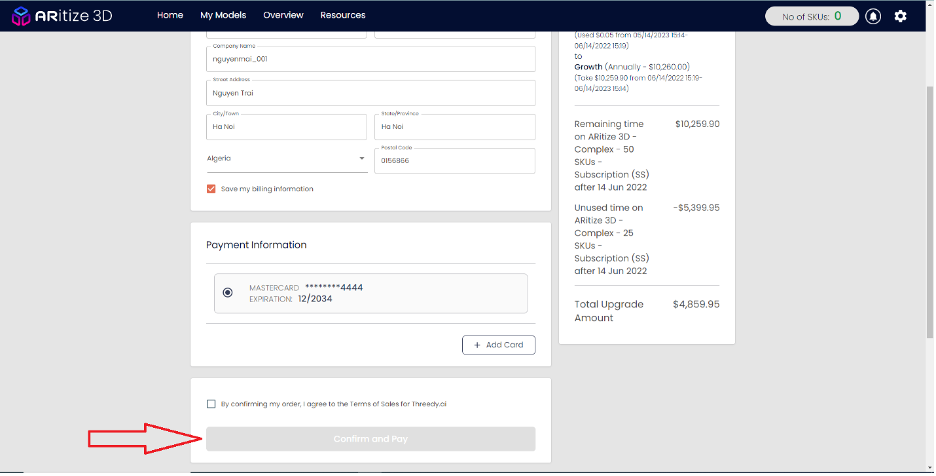
Step 1: After selecting a plan successfully, input your information into payment page.
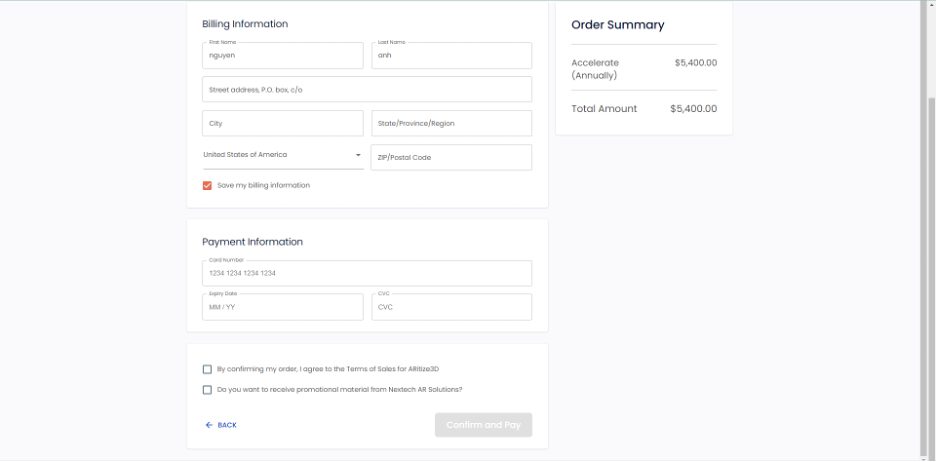
Step 2: Click on Confirm and Pay button after completing.
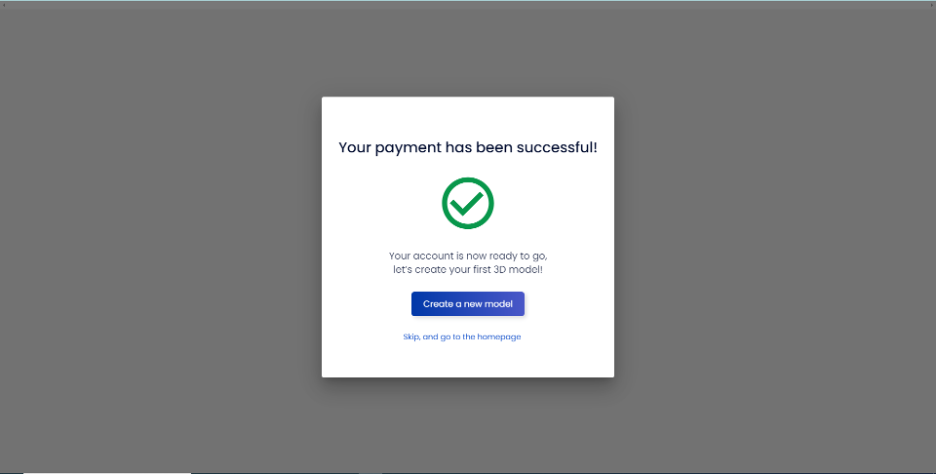
Step 3: The system will display a success message after paying successfully.
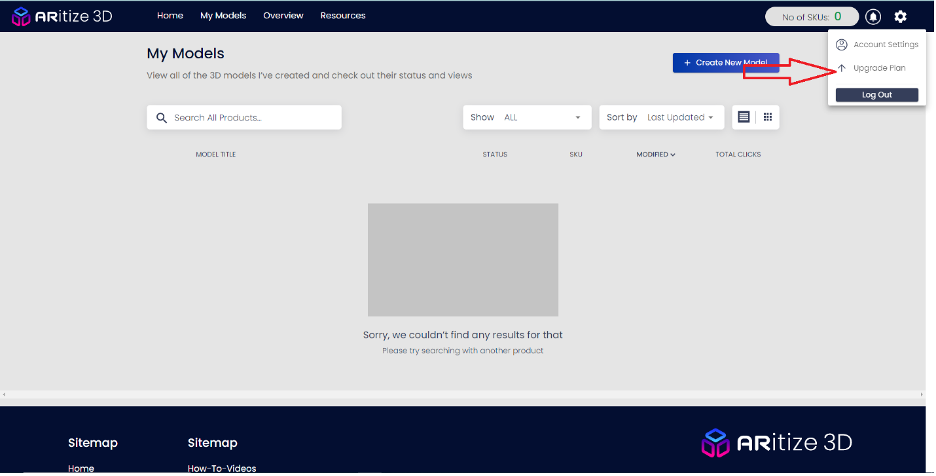
Step 4: If user want to upgrade plan, click on Upgrade Plan option on dashboard.
Step 5: Open Select Plan screen, select plan that you want to upgrade.
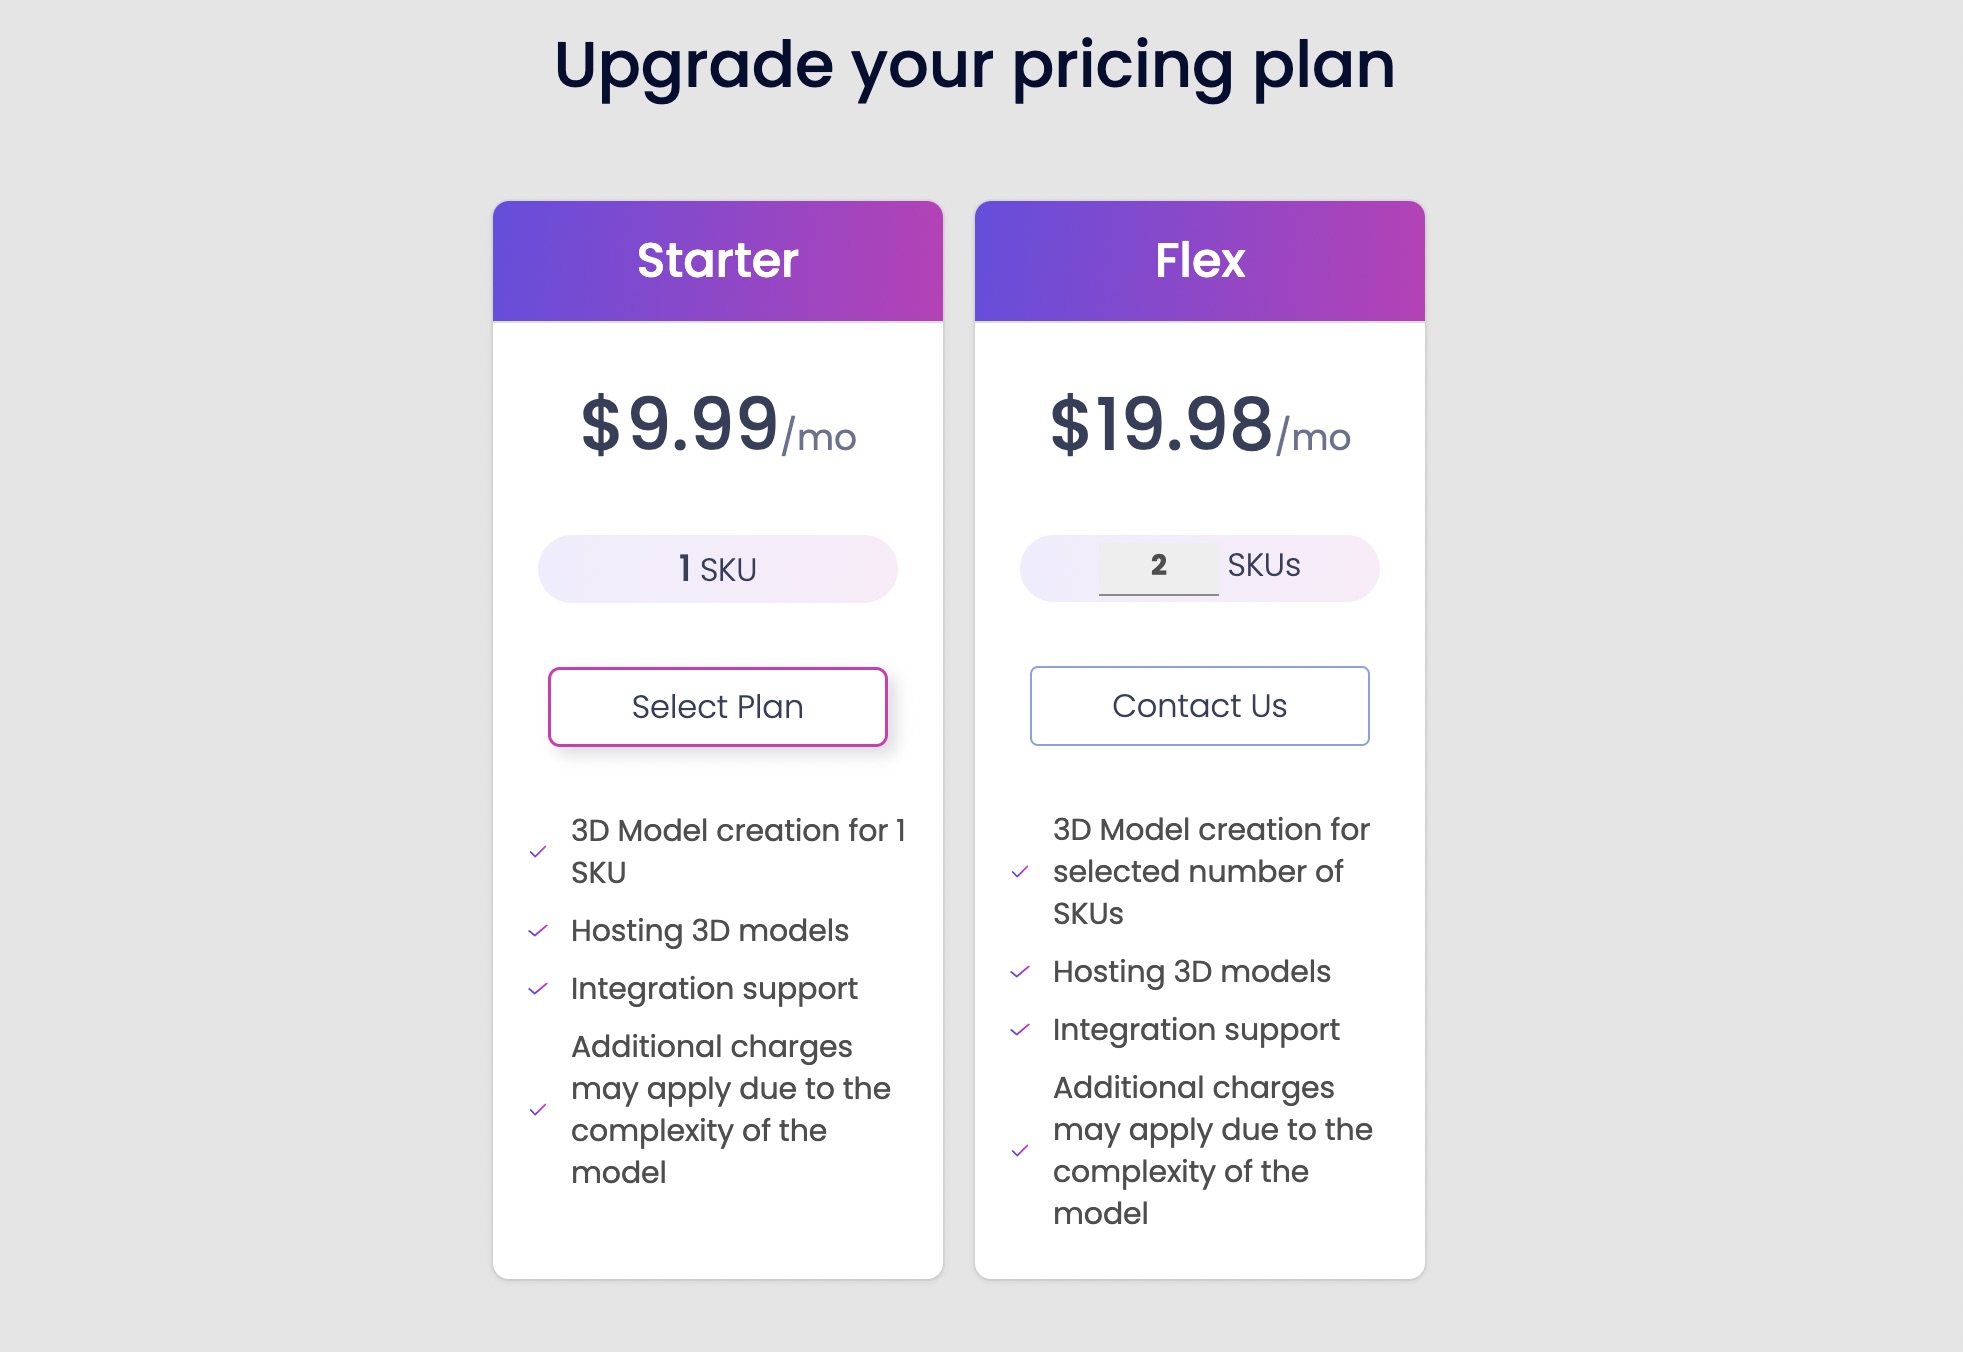
Step 6: Select Billing Period.
Step 7: Input billing information then click on Confirm and Pay.
Step 8: A message will display after paying successfully.

- To view billing history, click on Account Settings.

Open Billing History tab then click on View Invoice.
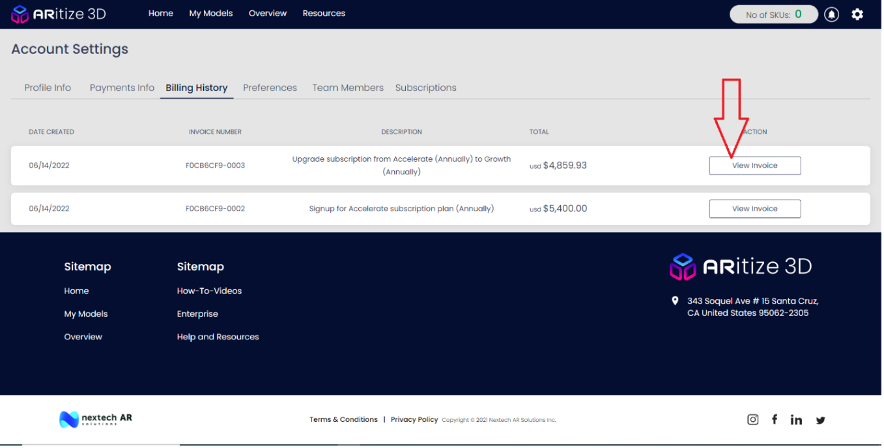
The user can download the invoice and see payment details.
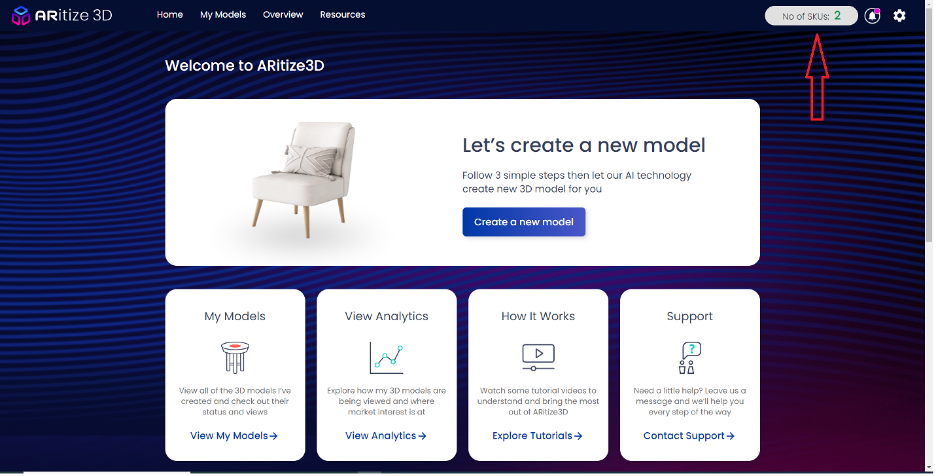
7. Access Dashboard
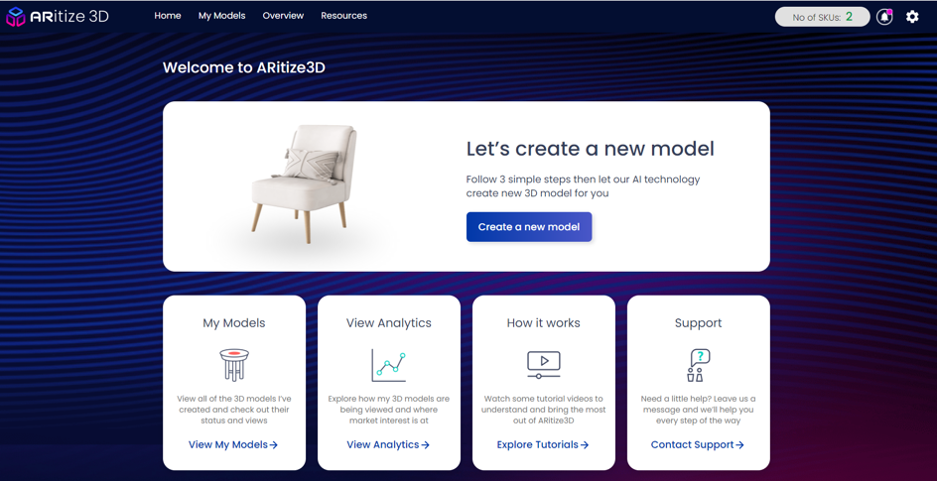
After paying successfully, go to the dashboard. On the dashboard screen, select the option that you want to do:
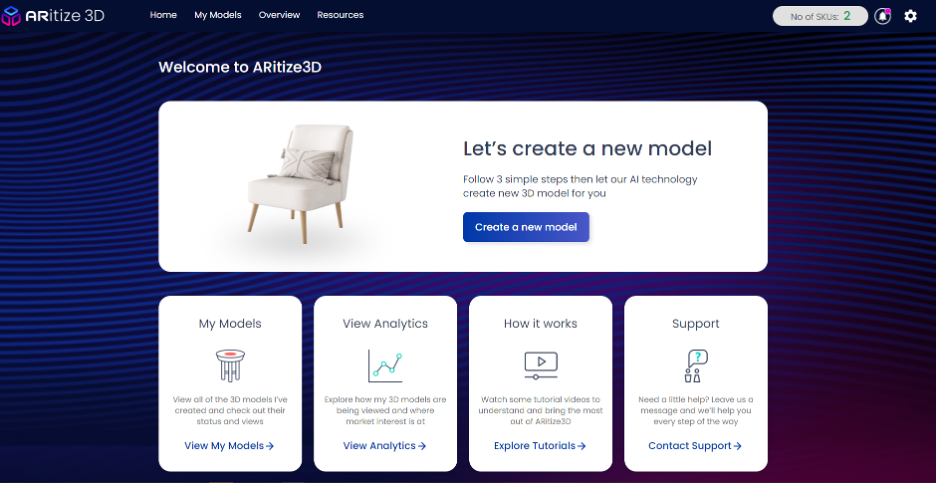
- Click on Create a new model if you want to create model.
- Click on View My Models to see all the models of current user.
- Click on View Analytics to view analytics gathered on the usage of the 3D model controls.
- Click on Explore Tutorials to view helpful how-to videos?.
- Click on Contact Support to contact sales and support?.
Youll also have access to the number of SKUs remaining that you can create 3D models for based on your subscription displayed on the top right of the screen.
To access account information, click on the Setting icon on the top right.
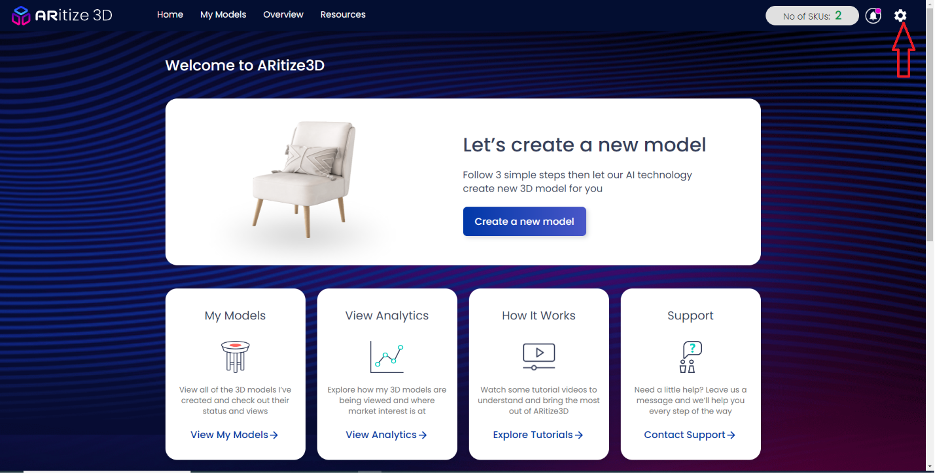
- Select Account Settings to edit account.
- Select Upgrade Plan to update plan.
- And select Log Out if you want to log out the application.
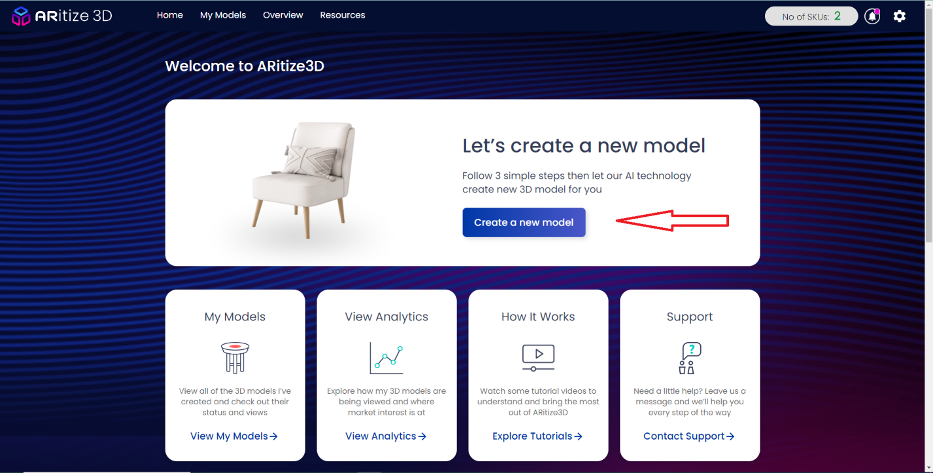
8. Create a new model
Step 1: Click on Create a new model button on the dashboard.
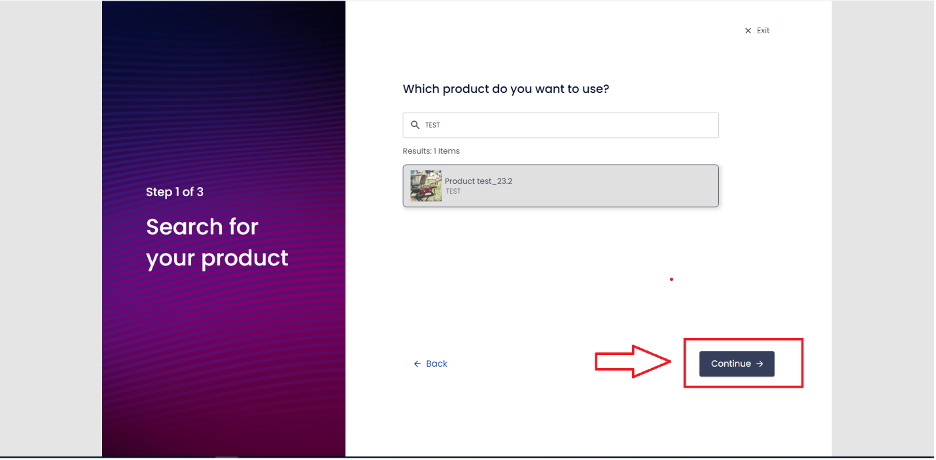
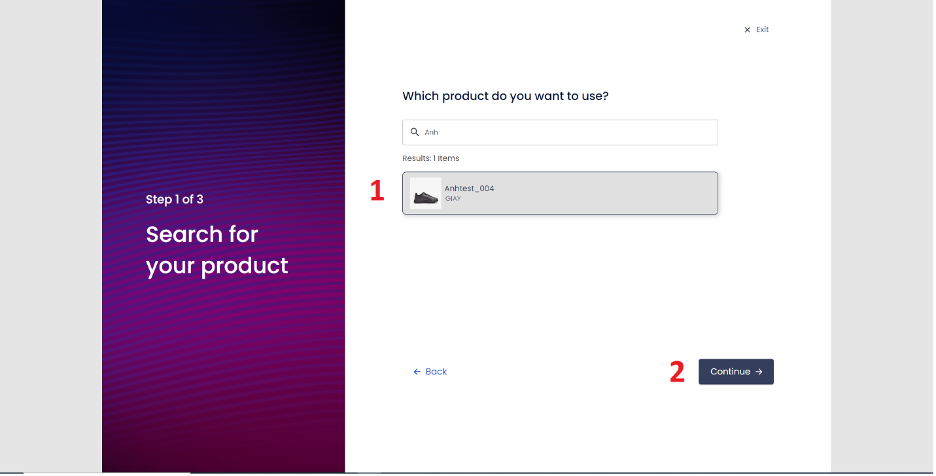
Step 2: Search the product that you want to use by inputting the information into the search field.
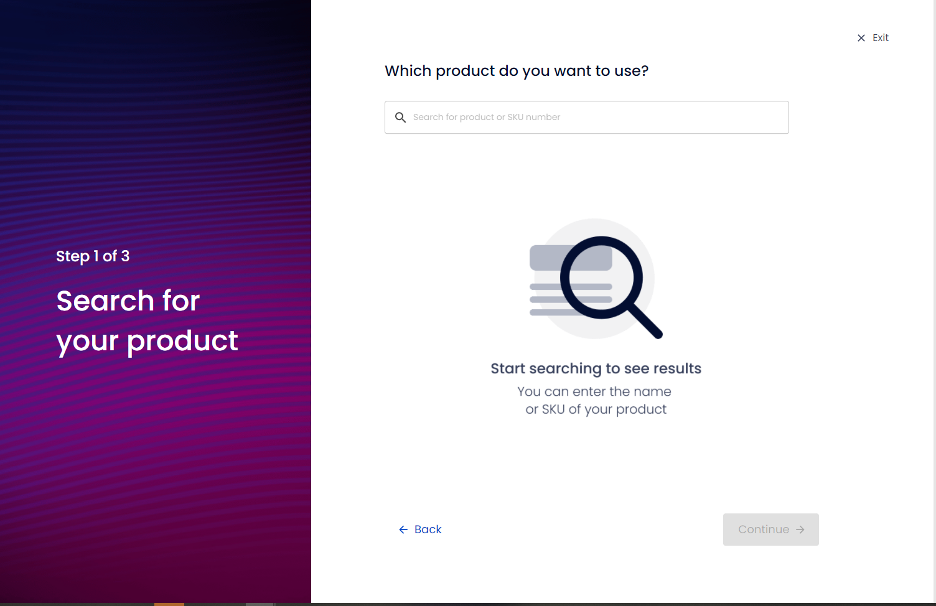
Or click Exit to close the page or Back to open the previous page.
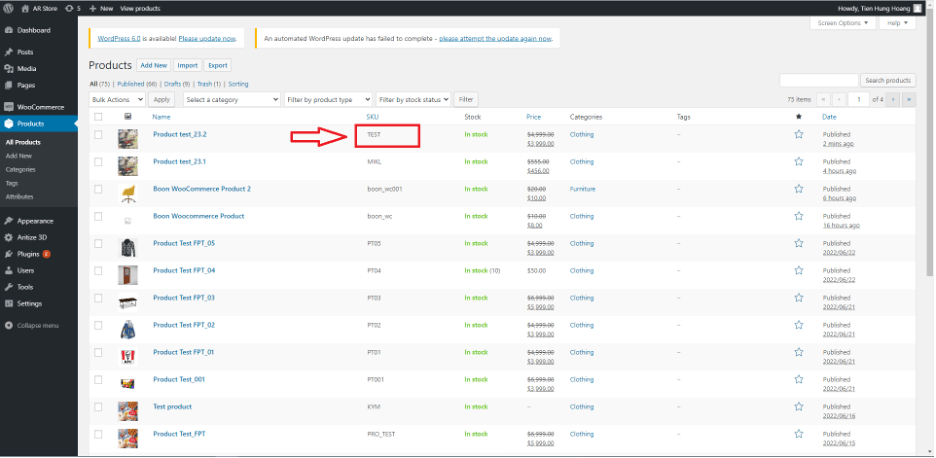
- SKU number of product is required in order for the Continue button to be active.
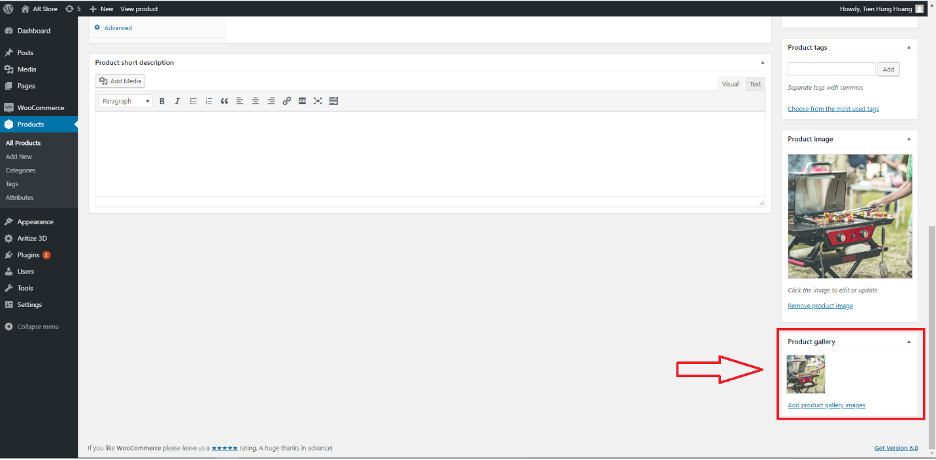
Notice: If you want to have an image to refer to on the 3D app, you must have an image in the product gallery on WooCommerce.
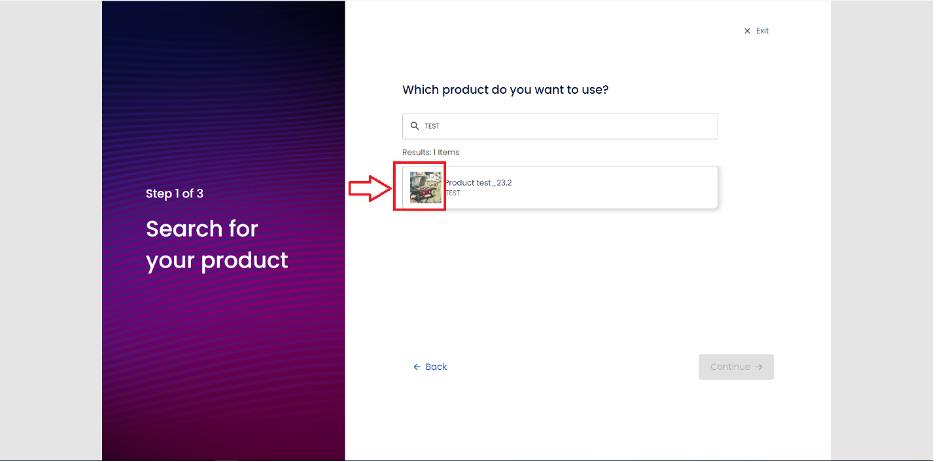
Step 3: Input search keyword or SKU number then click Continue.
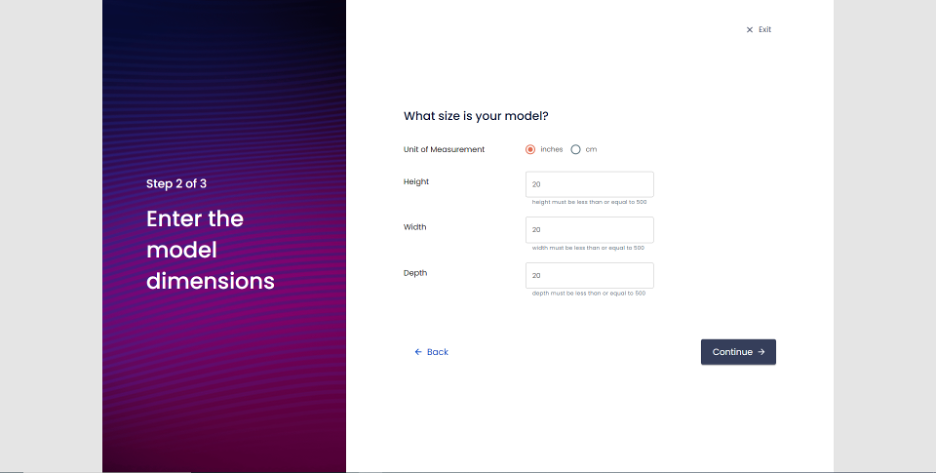
Step 4: Input the size of model then click Continue.
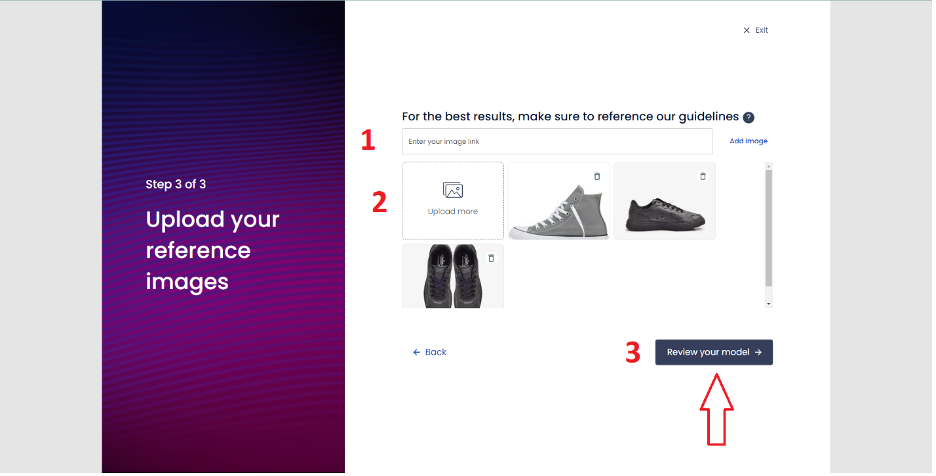
Step 5: Upload images of model.
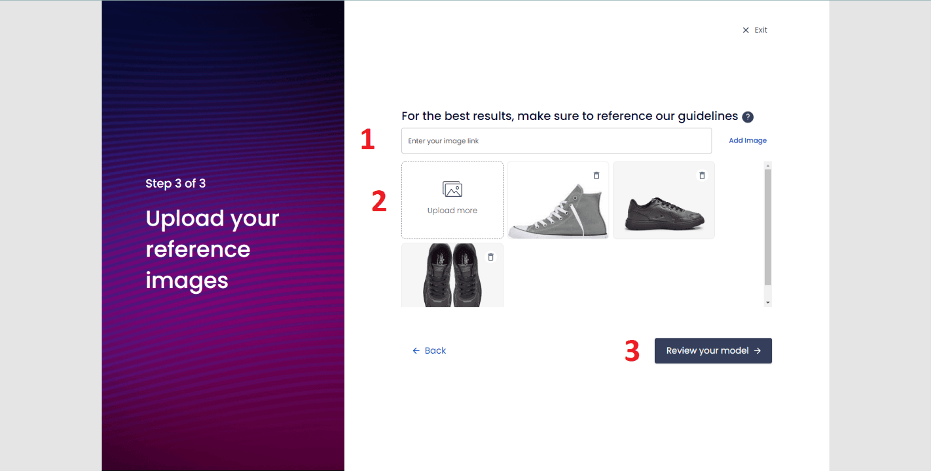
- Click the Delete icon to delete any uploaded image
Step 6: Click on Review your model button.
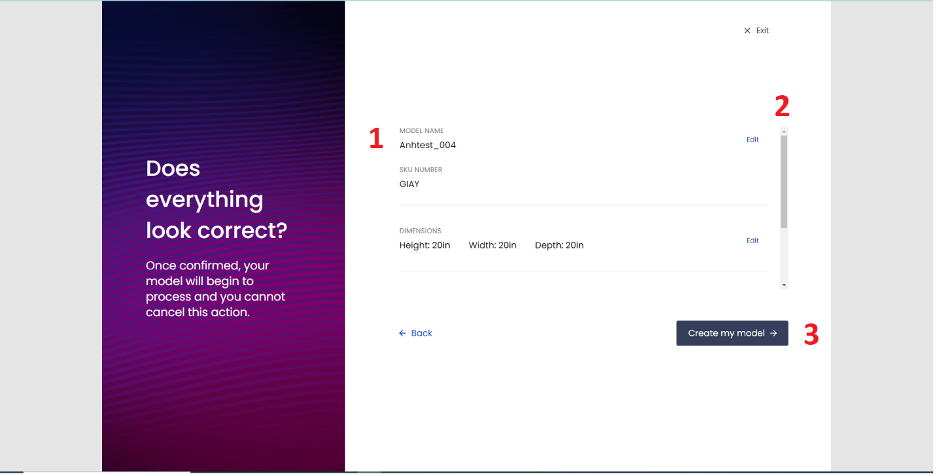
Step 7: Check the information of the created model then click Create my model to continue.
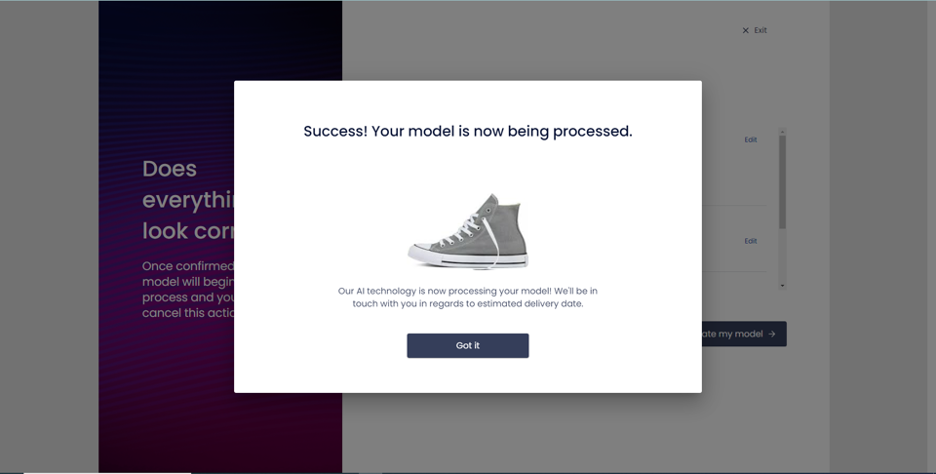
Step 8: A Success! pop up will appear, click Got it to confirm.
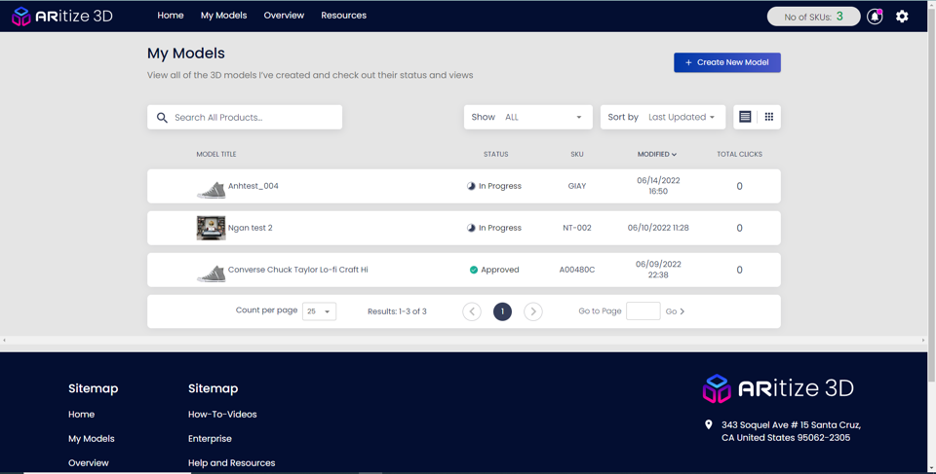
Step 9: Check information of created model displayed on My Models.
9. Review/Publish models
In this section, users can review their created model (information of models, comments, etc.) before approving.
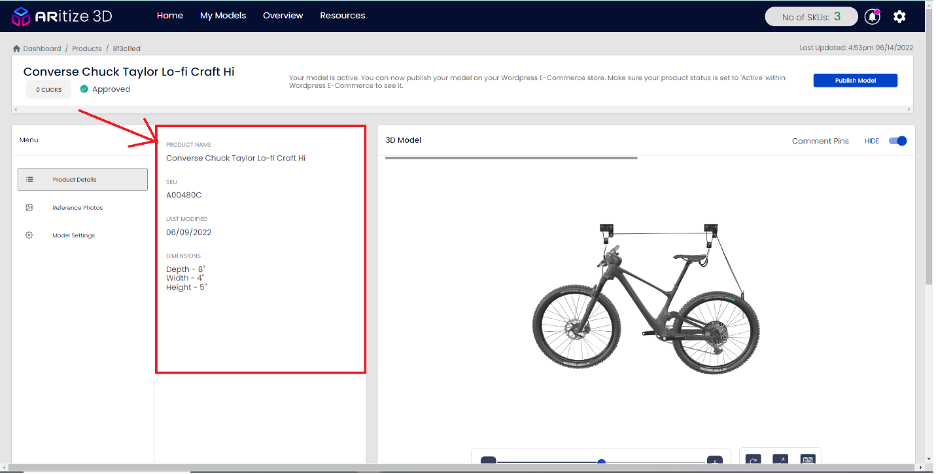
Step 1: Click on any model on the model list.

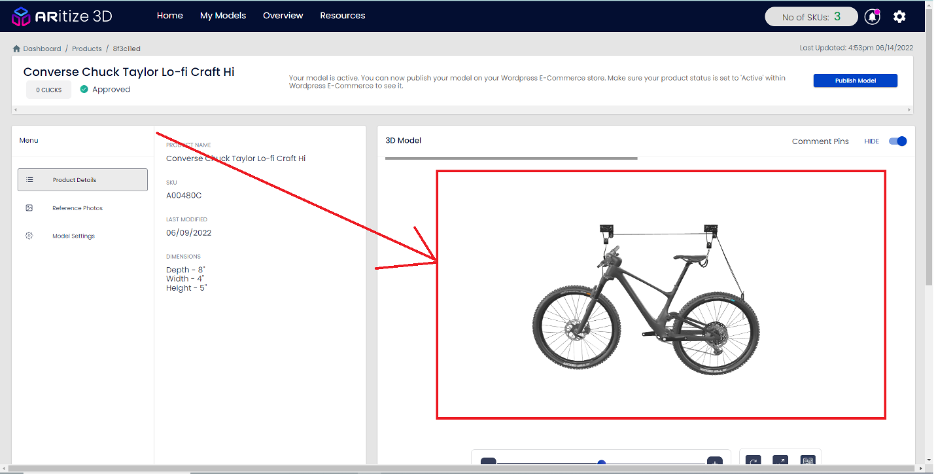
Step 2: On Product Details page, check information of the product.
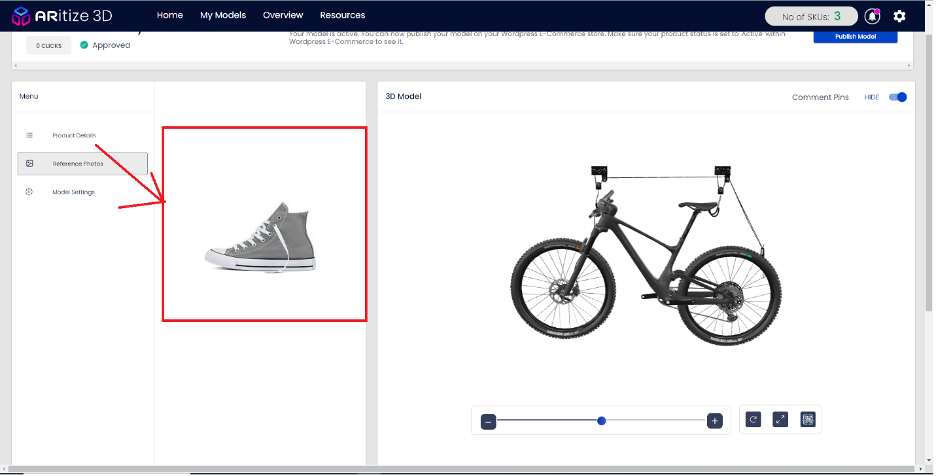
Step 3: Click on Reference Photos tab to view and rotate the 3D model.
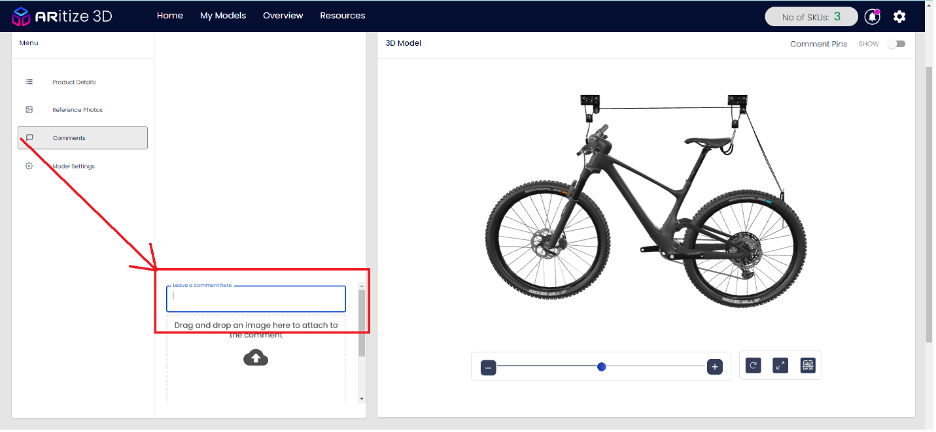
Step 4: Open Comment tab to insert a comment and then click submit.
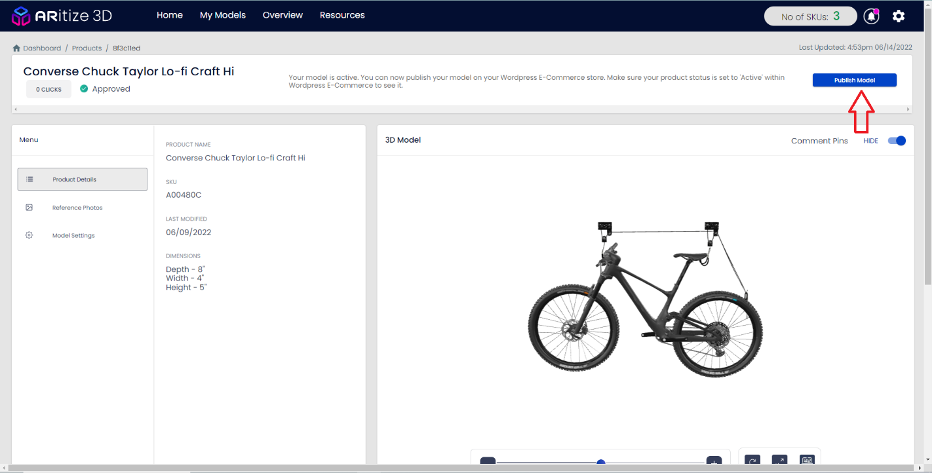
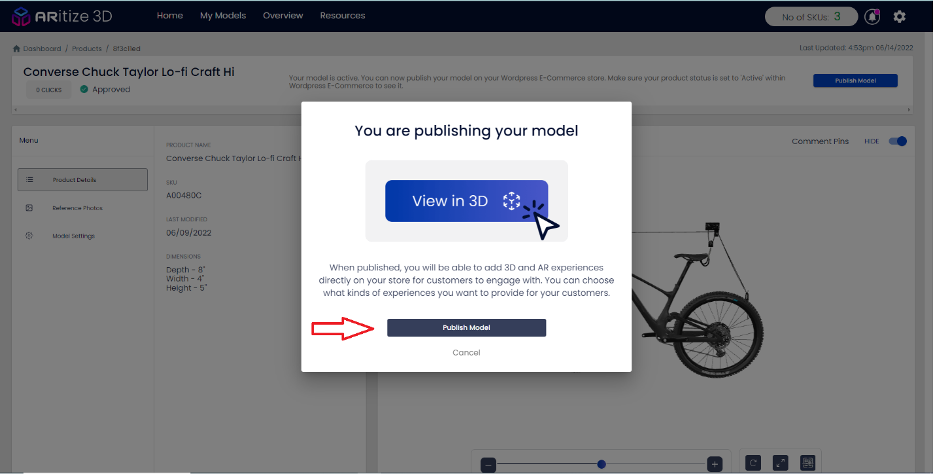
After the model is approved by admin, that model can be published.
Step 5: Click on Publish Model.
Step 6: Click on Publish Model on confirmation pop up.
10. Generate embed buttons
This section will show user how to add embed buttons for a specific product
Step 1: After publishing the model successfully by clicking on Publish Model button on the confirmation pop up, the system will display the embed settings pop. The user will need to select the Embed Buttons tab.
- Users select kind of buttons then click on Activate Selected Options.
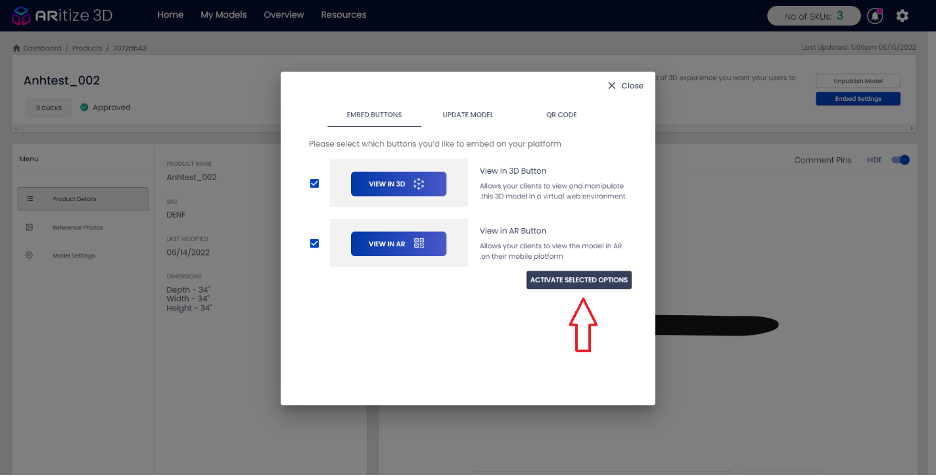
- Click on Update Model tab in case you want to update current model.
- And click on QR code if you want to see a QR code of your current model.
Step 2: After selecting buttons, go to store and active ARitize 3D Button.
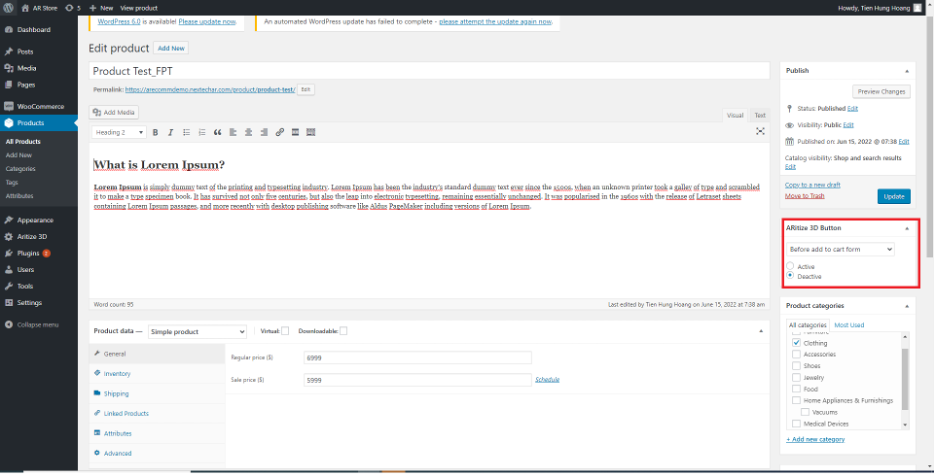
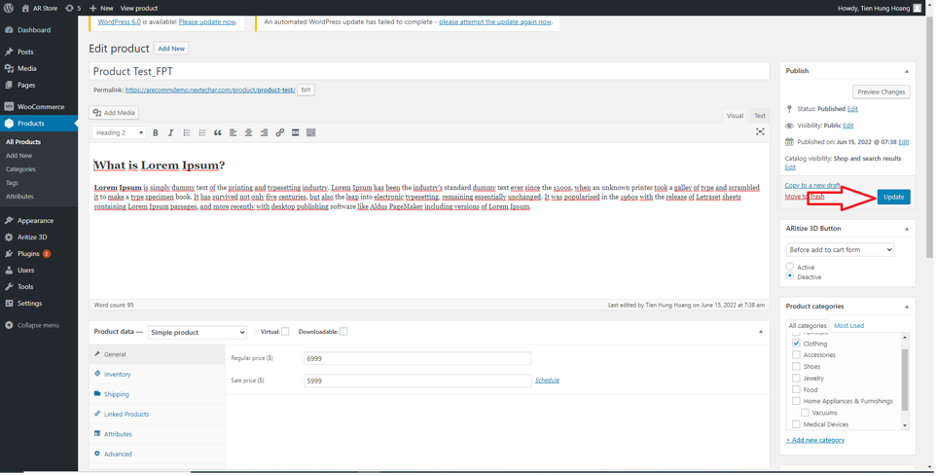
Step 3: If you want to use another position compared to default. After activating ARitize 3D Button, set up position of the buttons.
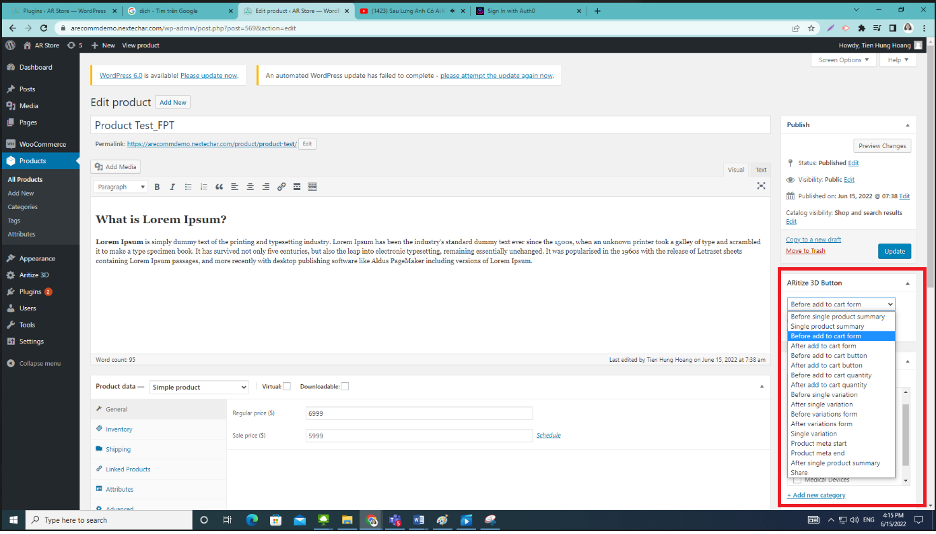
Step 4: After activating ARitize 3D Button and set up position of the buttons, click Update button.
Step 5: Check buttons displayed on the product page.
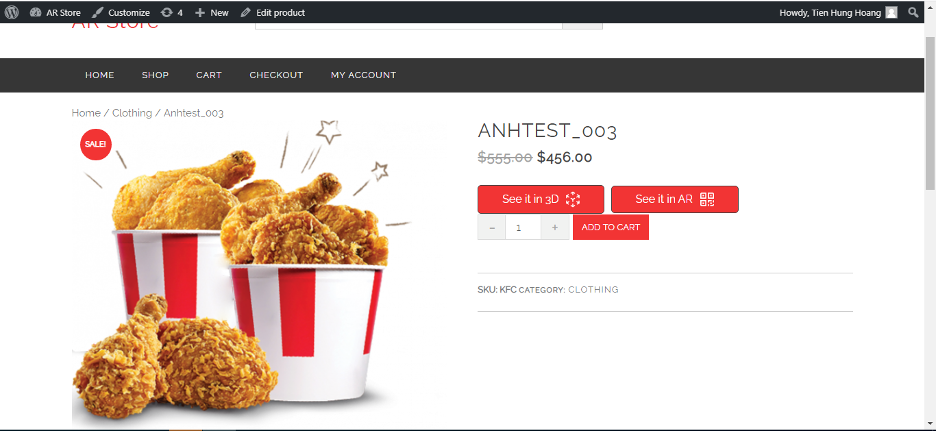
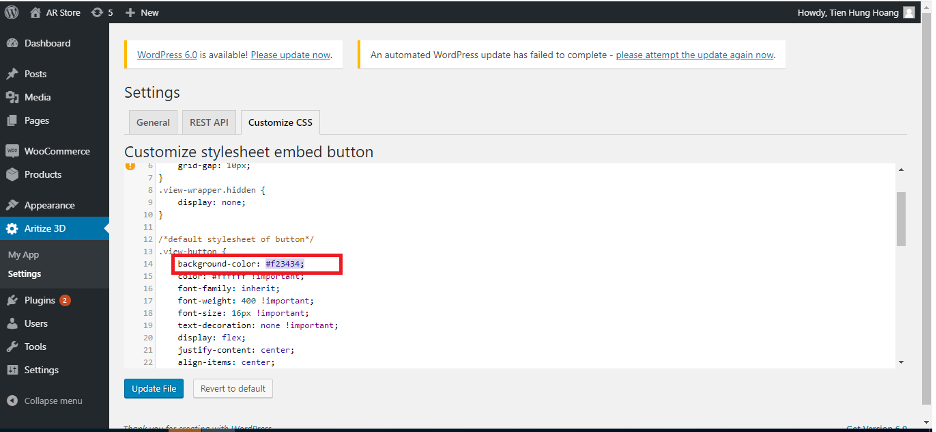
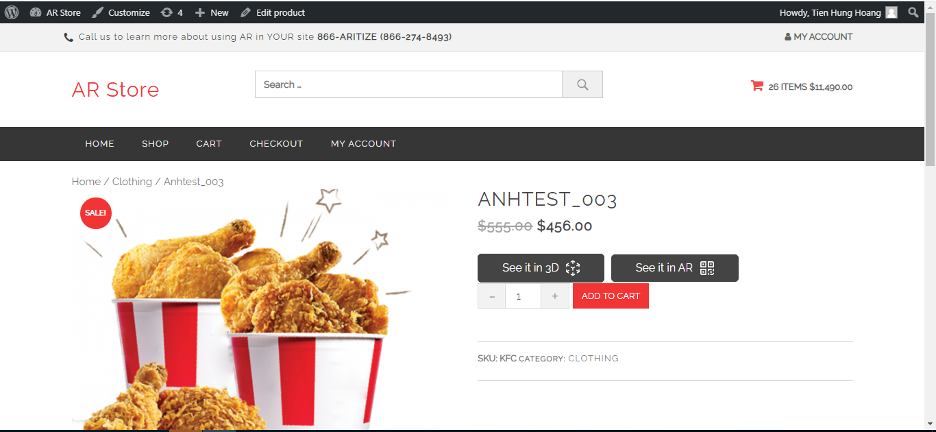
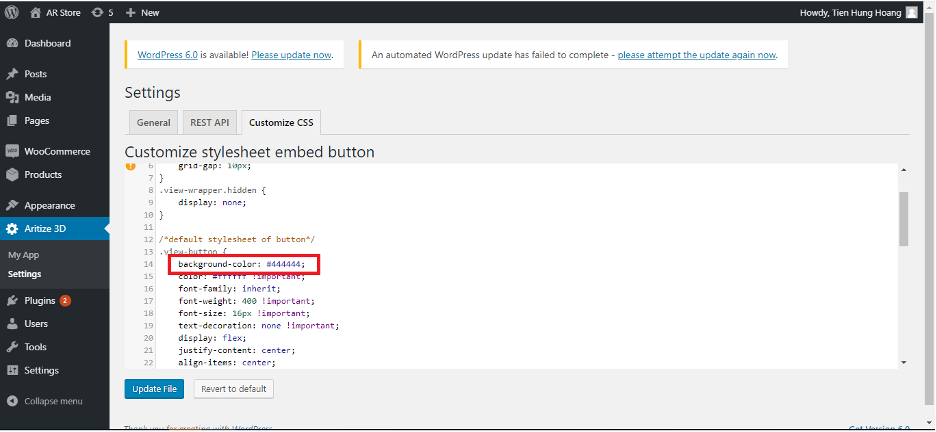
11. Customize CSS of embed buttons
Step 1: In the store, access Settings screen of ARitize 3D app in the left menu.
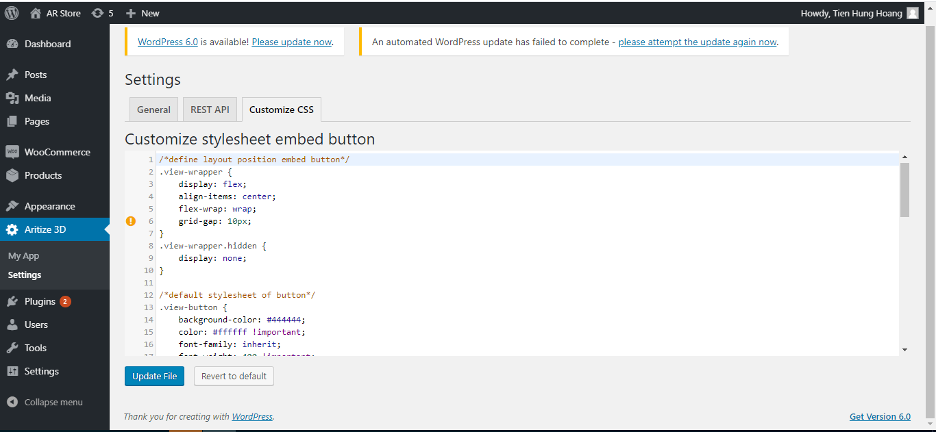

Step 2: Change the value of attribute on the code such as background-color, color, etc. that match with your needs.
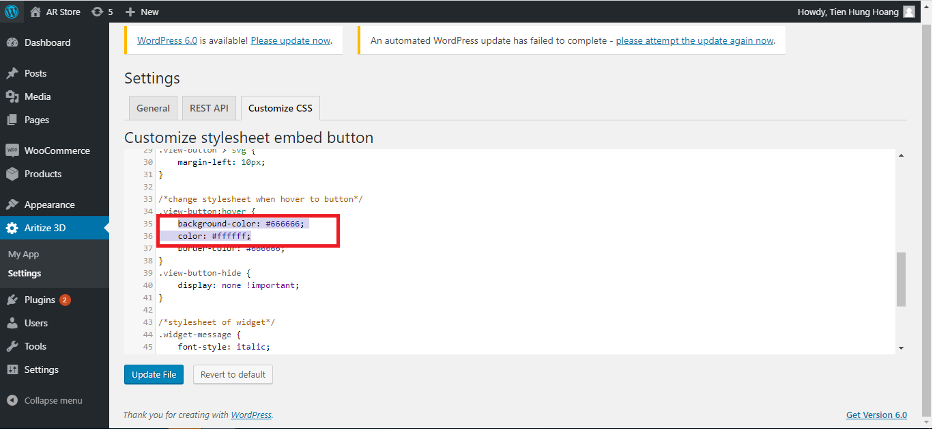
Step 3: Click Update File button to update the value of the attribute.
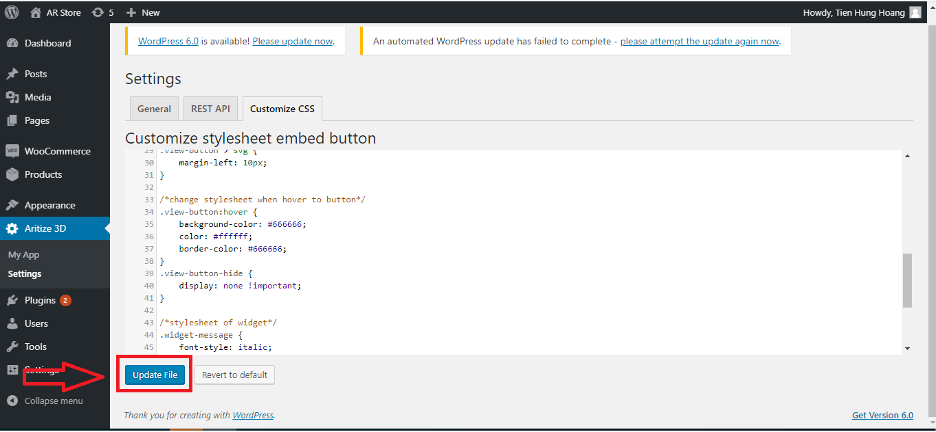
- Embed buttons CSS will be displayed correctly with the value is set in the Step 3.
Step 4: On View Product Page screen, embed buttons CSS must be displayed correctly with the value is set in Step 3.
Step 5: In the Settings screen of the ARitize 3D app, in the Customize CSS tab, click on Revert to default button to return default settings of the embed button.
- In case of deleting all the code and clicking "Update File" button, the system will display a warning pop up.

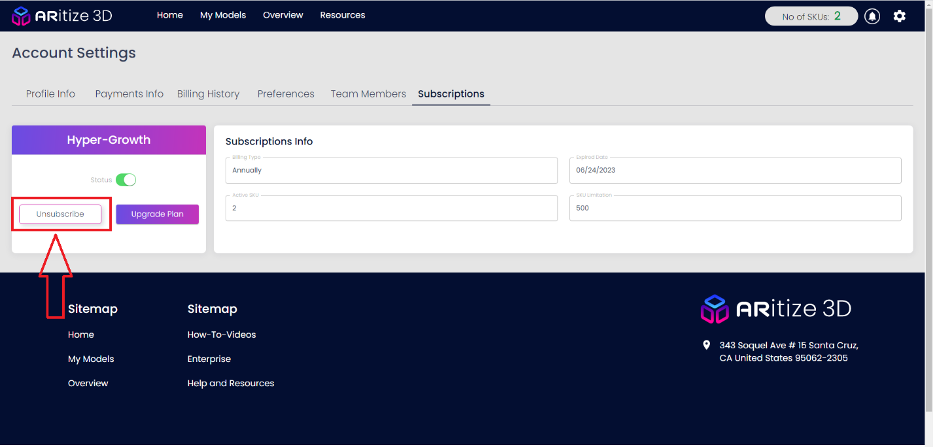
12. Unsubscribe
This is to unsubscribe from ARitize 3D.
Step 1: Open Subscription on Account Settings section of the ARitize 3D page, click Unsubscribe.
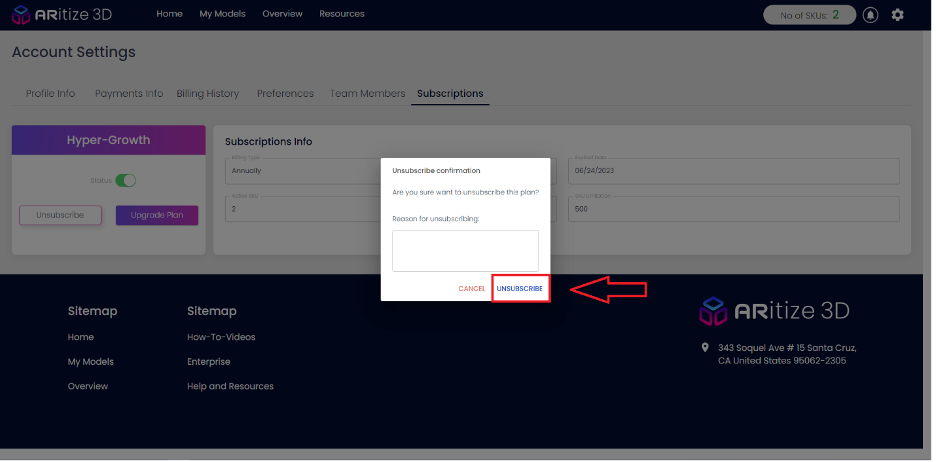
Step 2: After clicking Unsubscribe, the user must fill a reason for unsubscribing and click Unsubscribe button on the pop-up confirmation.
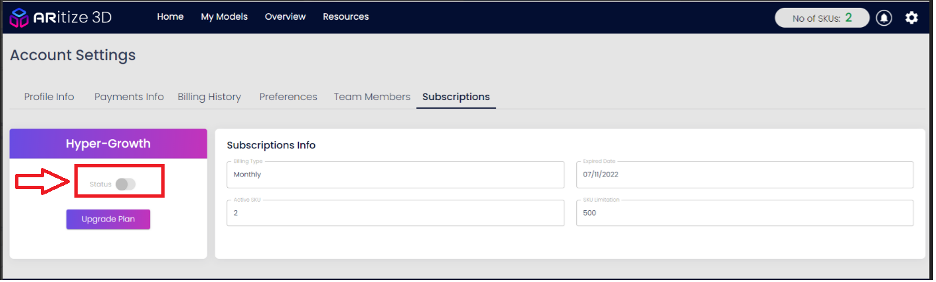
Step 3: After successfully unsubscribing, the status button will change to an inactive status.
13. Tips
The Code Snippet plugin blocks the process of WooCommerce embedding buttons on a product page.
It needs to be deactivated.
